
What We're Doing and Why
Setting up secure remote access to your homelab shouldn't require complex VPN configurations, port forwarding, or exposing services to the internet. In this guide, we'll use a Raspberry Pi as a NetBird routing peer that provides secure, zero-trust access to your entire homelab network from anywhere in the world.
This approach eliminates exposed ports entirely while giving you granular access control over exactly which devices and services are accessible. All traffic runs through WireGuard encrypted tunnels without the complexity of managing WireGuard configurations, and the mesh networking architecture means you get direct peer-to-peer connections whenever possible, avoiding single points of failure.

Why a Raspberry Pi?
We're using a Raspberry Pi for this guide because it's affordable, energy-efficient, and widely available. However, this exact same setup works on virtually any Linux-based system including other single-board computers like Orange Pi or ODROID, mini PCs from Intel NUC to Minisforum, NAS devices, virtual machines on Proxmox or VMware, old laptops, or even routers such as pfSense and OPNsense .
The Raspberry Pi is perfect for this use case because it consumes minimal power at just 5-15W, runs silently 24/7, and takes up virtually no space in your rack or network closet. For less than $100, you get a complete setup with excellent community support that can handle routing for most home networks without issue.
Setting Up the Raspberry Pi with Ubuntu Server
Why Ubuntu Server?
While this guide works with any Pi distribution whether that's Raspberry Pi OS, DietPi, or other Linux distros, we're using Ubuntu Server because it's headless by default with no GUI overhead wasting resources. It's the same Ubuntu you'll find in enterprise deployments, which means consistent tooling and excellent ARM64 support with regular security updates. Most importantly, if you're familiar with using Linux, you already know Ubuntu.
Installation with Raspberry Pi Imager
Start by downloading Raspberry Pi Imager for your operating system and inserting a microSD card with at least 8GB of capacity, though 32GB is recommended for breathing room.
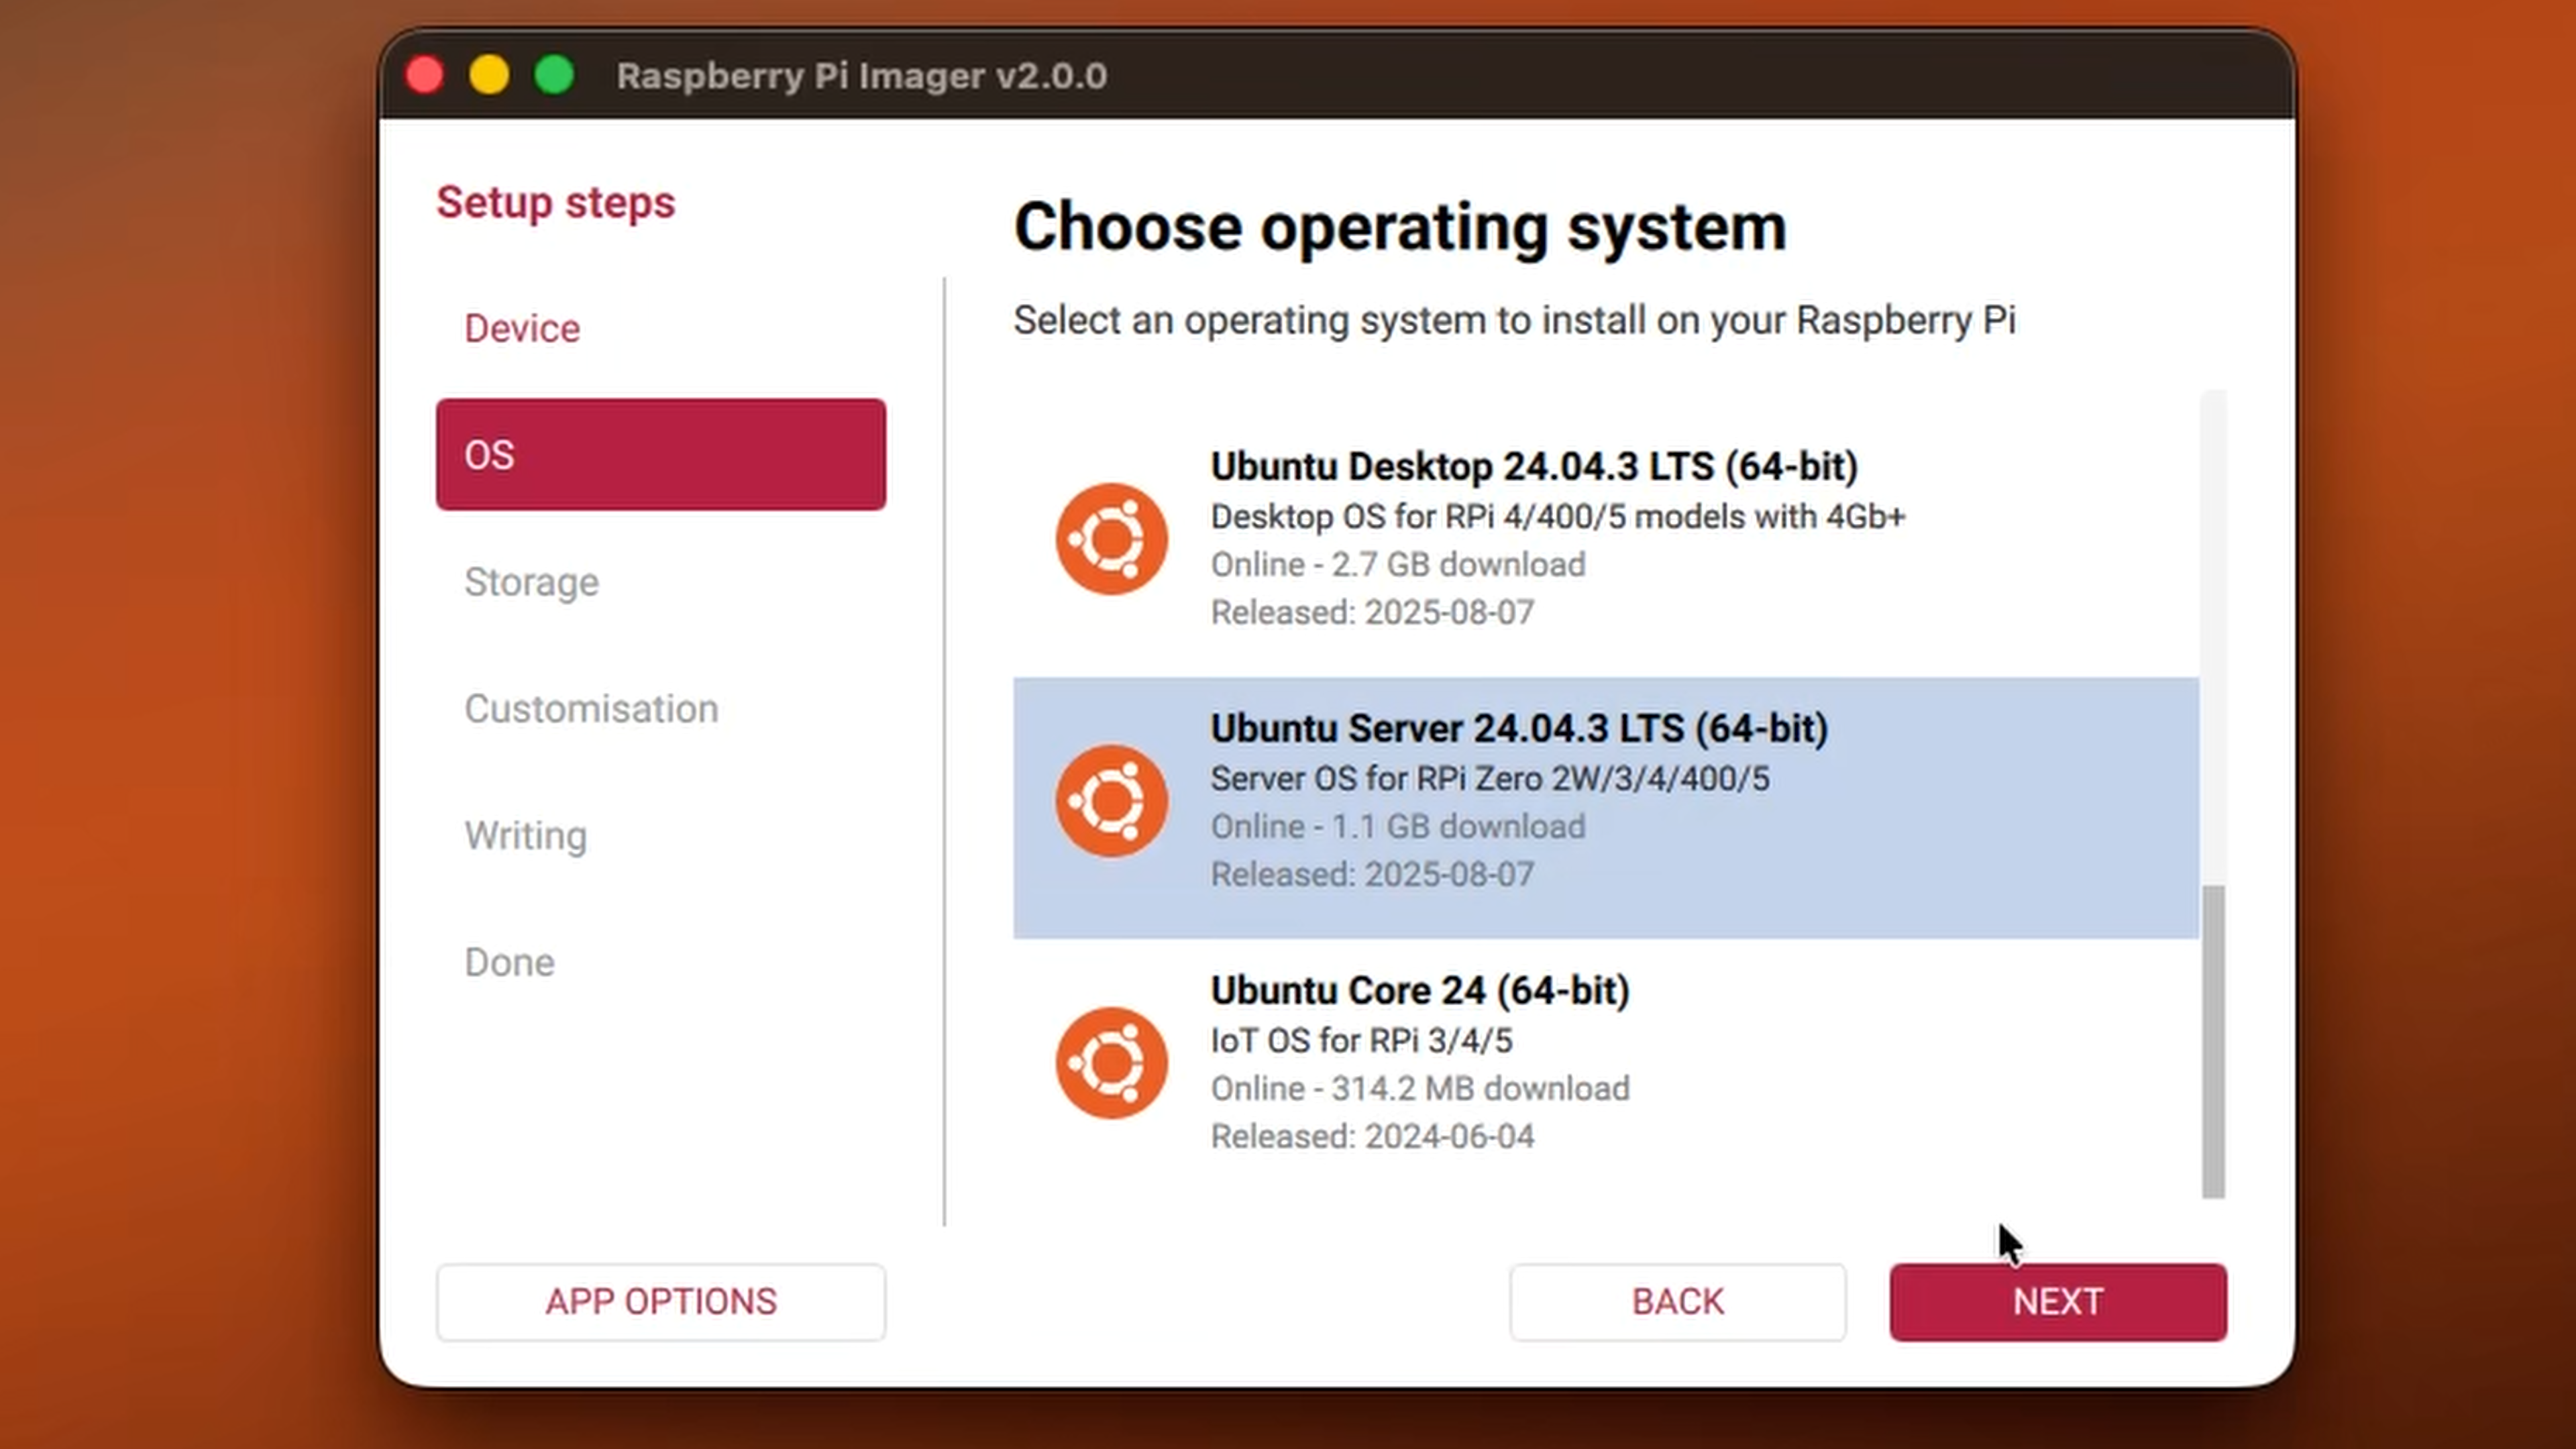
Open Raspberry Pi Imager and choose Ubuntu Server 24.04 LTS (64-bit) from the "Other general-purpose" OS section under Ubuntu. Select your microSD card as the storage destination, then click the gear icon to configure the advanced options. Here you'll set your hostname to something memorable like , enable SSH with password authentication, and configure your username and password. If you're not using Ethernet, add your WiFi credentials here as well, along with your locale and timezone settings.
Write the image to the card, insert it into your Pi, and power it on. It may take a couple minutes to complete its first boot sequence.
NOTE: Raspberry Pi has many many supported add-ons and accessories. For example, I have what is called a HAT for my Raspberry Pi 5. This HAT give me the ability to add a NVMe SSD, substantially increasing performance, and the option to use PoE for a single-cable setup.
Post-Install Setup and NetBird Installation
Initial Connection
Once your Pi boots, which typically takes 2-3 minutes on first run, connect via SSH using either the hostname you configured or the IP address assigned by your router:
System Updates
First, ensure your system is up to date:
Install NetBird with One Command
NetBird provides a simple one-line installation script that detects your system architecture, adds the NetBird repository, installs the latest stable version, and configures the service to start on boot:
Connect to Your NetBird Network
Run the following to authenticate and join your network:
This will present you with an Authentication URL. Open it in your browser, log in with your NetBird account, and approve the device. Alternatively, you can authenticate with a setup key. Learn more about generating setup key, learn more about that here .
Once the device is connected it should show up under the Peers page on the NetBird dashboard. Here we can quickly assign the Raspberry Pi a group. Within the Groups column click the pencil to edit and add the peer to a new group, this can be something like “RaspberryPi”.
Configuring NetBird as a Connector
Define Your Homelab Network as a Resource
Log into the NetBird Control Center and navigate to Networks. Click Add Network and give it a descriptive name like "Homelab Network". Then click the option that will come up automatically that says Add Resource. Give it a name and define the address with your homelab subnet such as . On this same dialog set a Destination Group this is the group your give users access so they can connect to the subnet, this can be something like “Homelab Subnet”. Select your Raspberry Pi as the routing peer and choose which distribution groups can access this route.
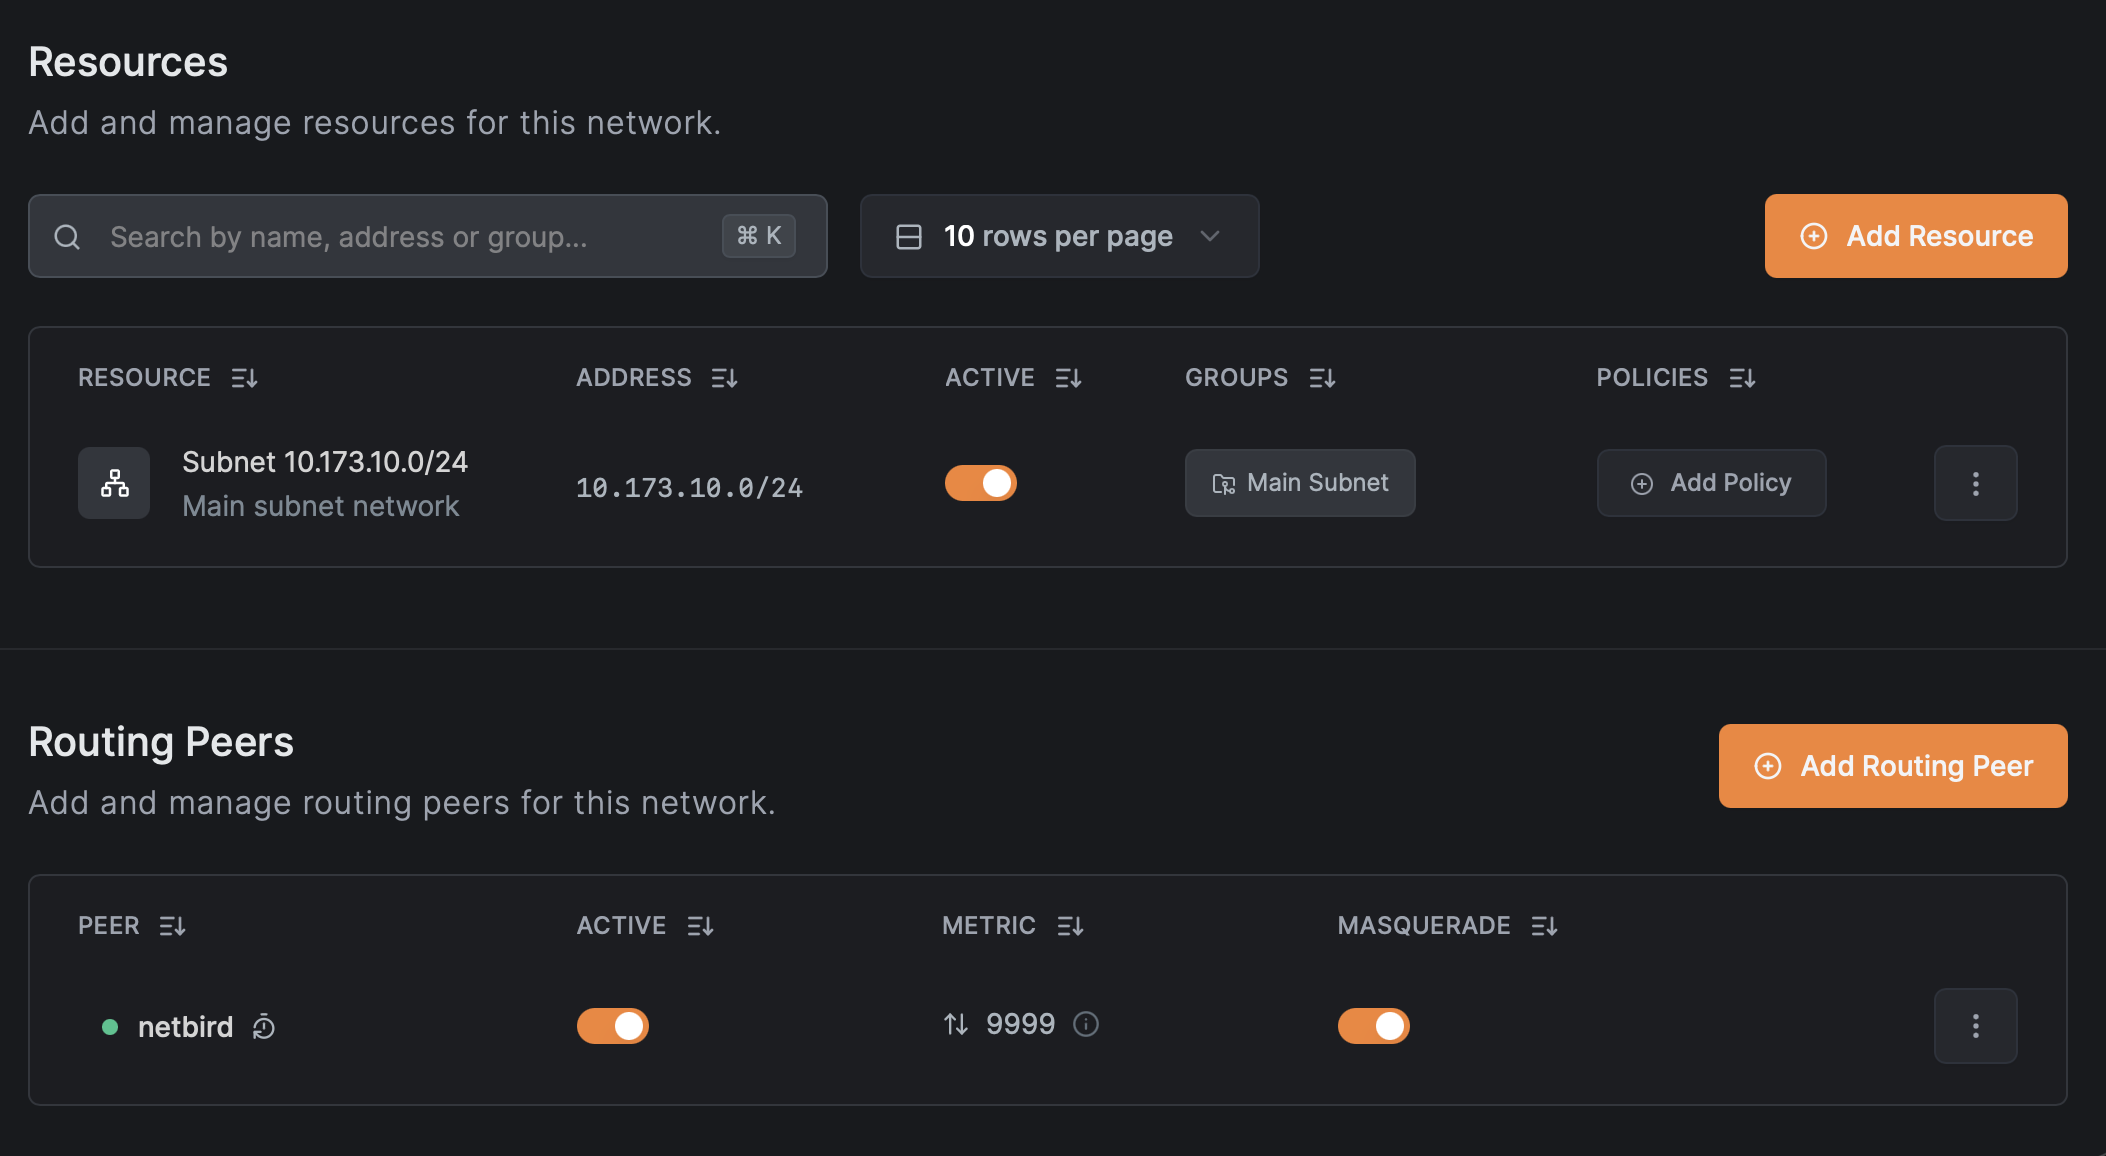
For more granular control, you can define specific IPs as resources instead of the entire network. For example, creating a route for just with the name "Proxmox Server" and its own Destination Group allows you to grant access to specific services rather than blanket access to everything.
Creating Access Control Policies
Navigate to Access Controls to define who can access what. You might create a "Full Homelab Access" policy that allows your Admin group to reach the entire Homelab Network route, or a more restrictive "Web Services Only" policy that grants your Family group access to specific IPs on ports 80 and 443 only.
Testing Your Setup
From any device with NetBird installed and authenticated, you can verify the route is available with from a client device, test connectivity to homelab devices with a simple ping, and access services directly using their internal IP addresses. Your Proxmox web UI, NAS admin panel, and other services are now accessible as if you were sitting at home.
Next Steps
- Consider setting up DNS for internal hostnames to avoid remembering IP addresses.
- Configure additional peers as backup gateways for redundancy.
- Implement network segmentation with multiple routes for different security zones.
- Add monitoring with NetBird's activity logs.
- Explore NetBird's new SSH features.
This setup transforms your homelab into a securely accessible private cloud without the complexity of traditional VPN solutions or the security risks of port forwarding. The beauty of NetBird's approach is that it scales effortlessly - add more peers, define more routes, and create sophisticated access policies all from the central control panel.