
What is ZeroByte?
ZeroByte is a modern backup automation platform for self-hosters built on top of Restic. It provides a web-based interface for managing backups with support for multiple protocols and storage backends. ZeroByte offers automated backups with flexible scheduling, allowing you to set up custom backup frequencies and times. All backups are protected with end-to-end encryption through Restic, ensuring your data remains secure both in transit and at rest. The platform's multi-protocol support makes it versatile for various network environments and storage setups.
ZeroByte supports a wide variety of volume types (the data you want to back up):
- NFS shares
- SMB/CIFS shares
- WebDAV servers
- rclone remotes
- Local directories
For repositories (where backups are stored), ZeroByte supports:
- S3-compatible storage (Amazon S3, MinIO, Wasabi, DigitalOcean Spaces, etc.)
- Google Cloud Storage
- Azure Blob Storage
- SFTP servers
- REST servers (restic rest-server)
- rclone remotes (40+ cloud providers including Google Drive, Dropbox, OneDrive, Box, Hetzner, and more)
- Local directories
The platform includes retention policies for efficient storage management, helping you maintain the right balance between backup history and storage usage. ZeroByte's web-based restore functionality makes it easy to recover files and directories from any backup snapshot directly through the interface. Built-in health checks and monitoring capabilities help ensure your backups are running smoothly and alert you to any issues.
Note: ZeroByte is currently in active development. While it's already quite functional, there may be significant changes between versions. Until there's a stable release, it's recommended to use ZeroByte as part of a multi-tier backup strategy rather than your sole backup solution.
Installing ZeroByte
ZeroByte runs as a Docker container, making installation straightforward. If you don't already have Docker installed, you can install it with the following commands:
Add your user to the docker group.
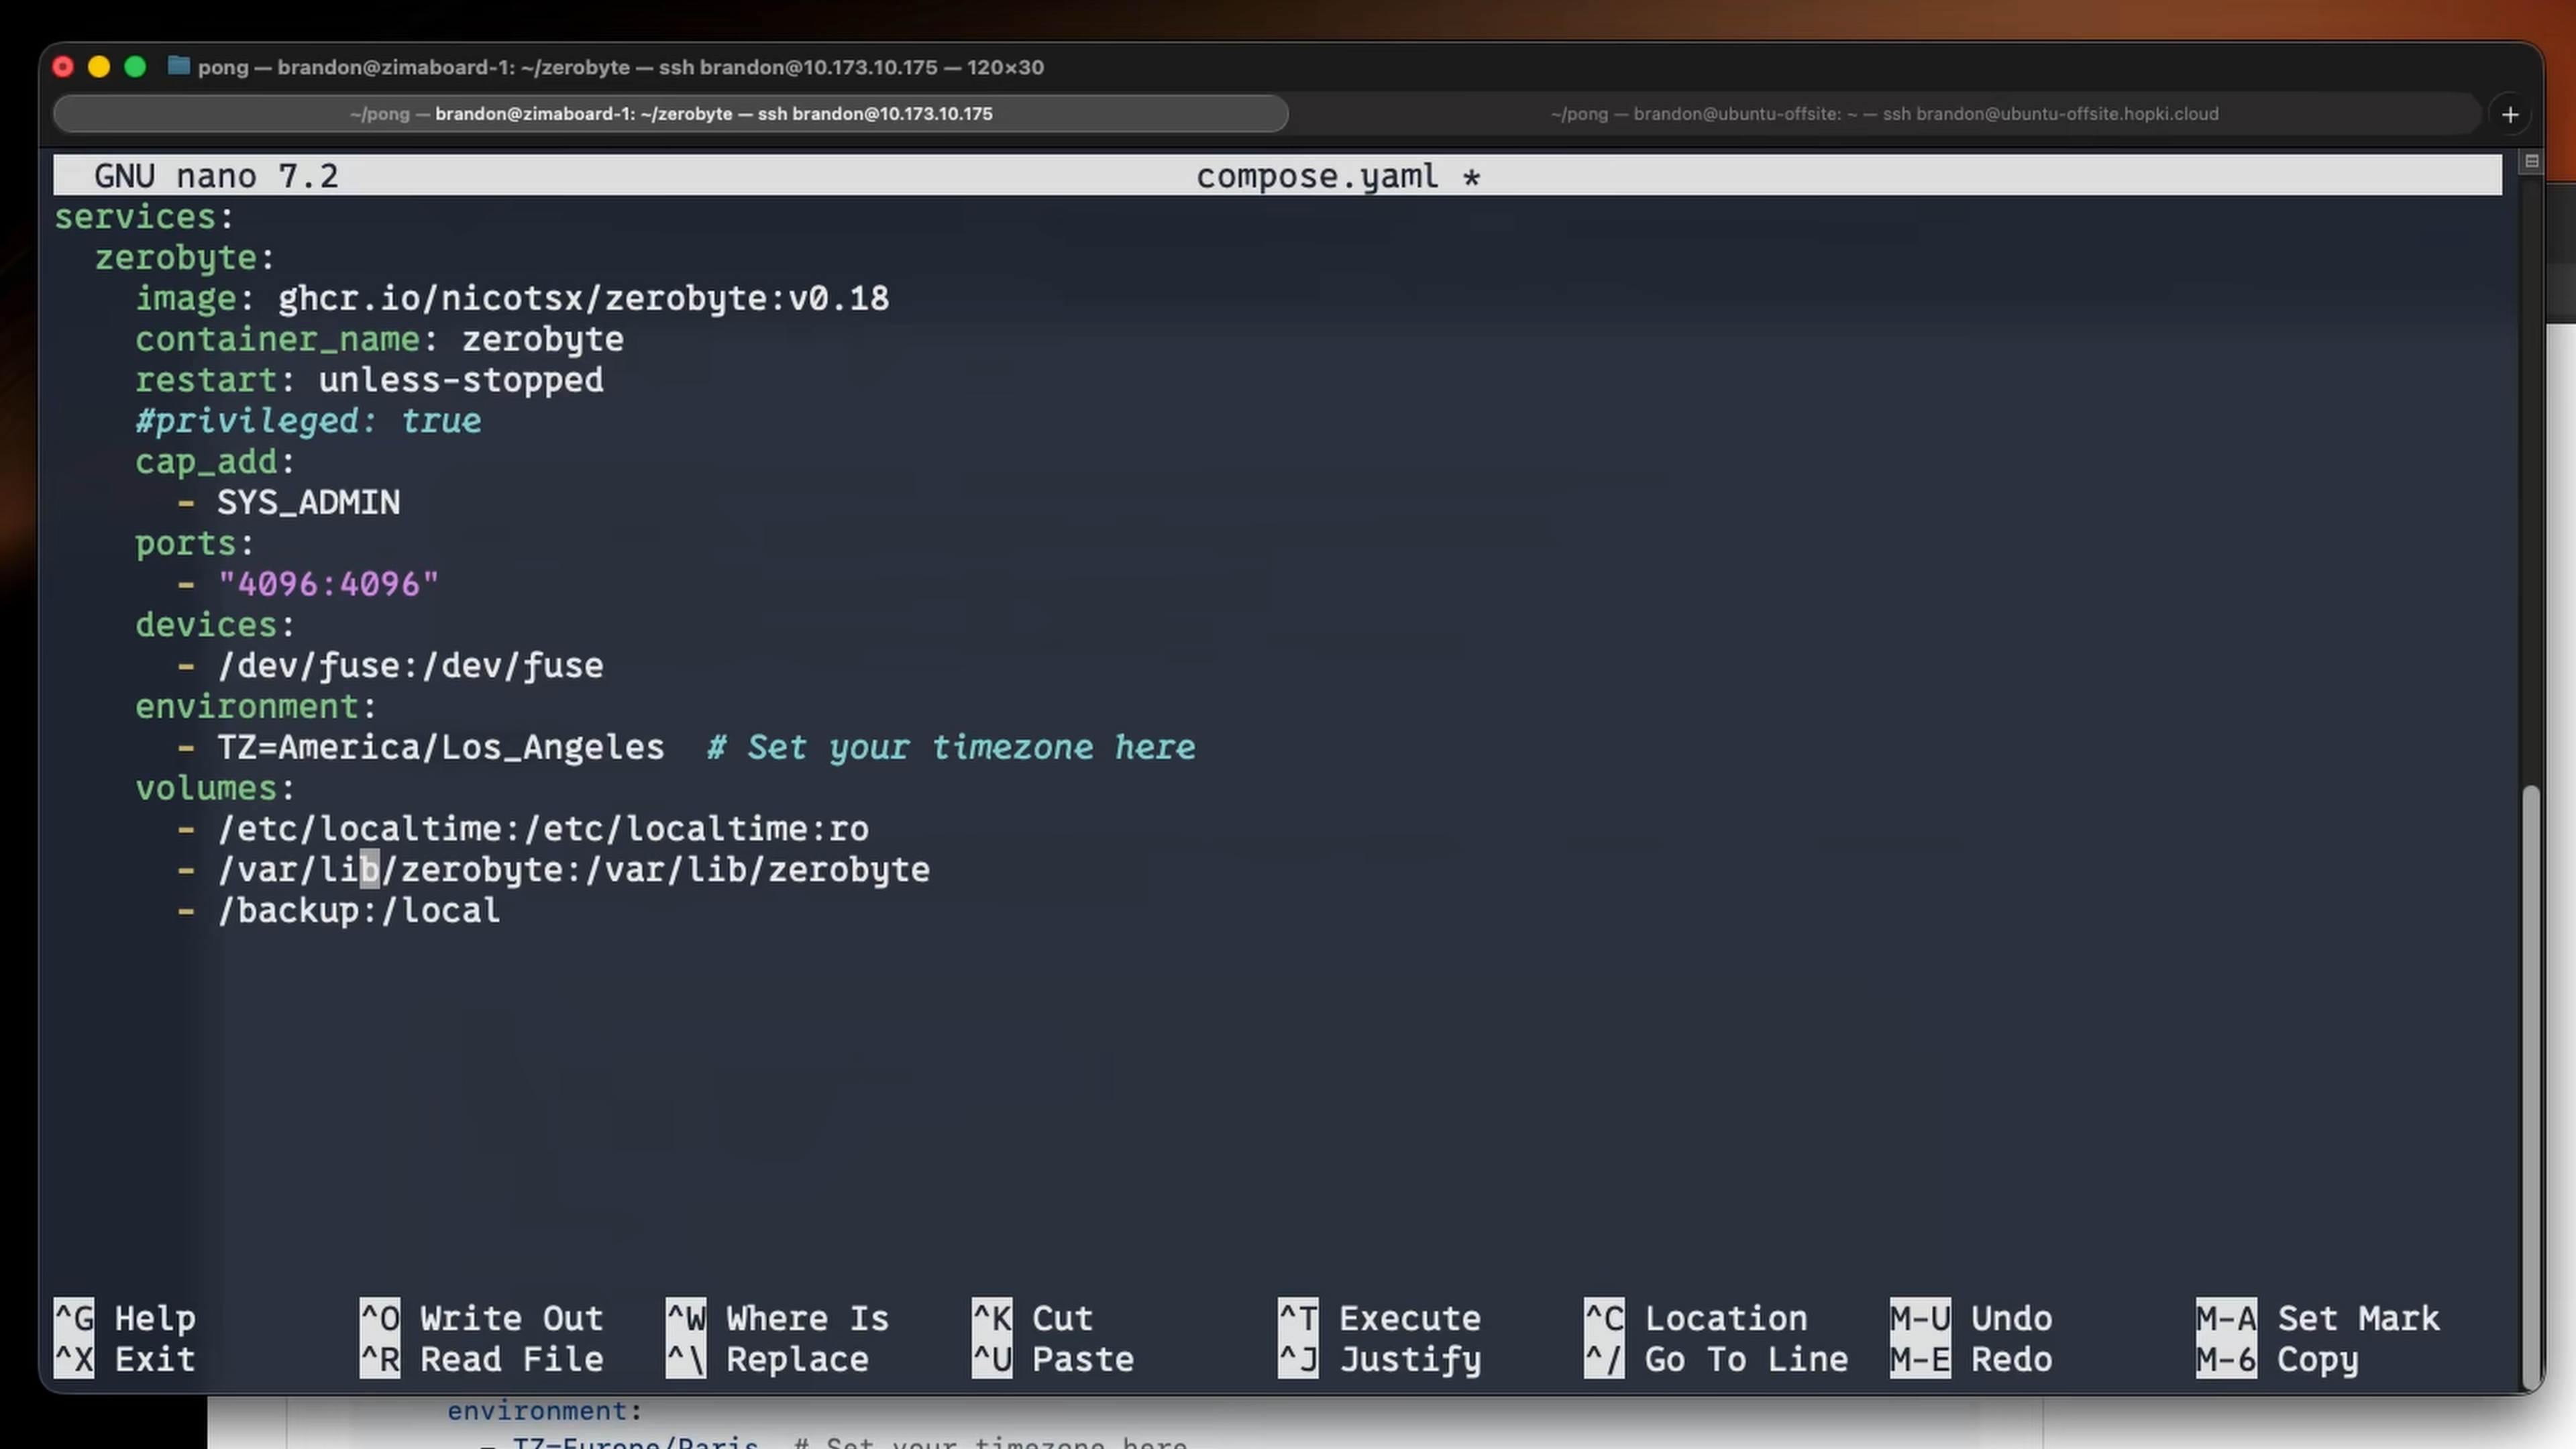
Once Docker is installed, create a file with the following configuration:
Note: If you encounter issues mounting shares, you may need to uncomment the line in the configuration above. This is not mentioned in the official ZeroByte documentation and may work fine for you without it. This may be addressed in a future version.
Key configuration points:
- Port 4096: The web interface will be accessible at
- SYS_ADMIN capability and FUSE device: Required for mounting remote shares (NFS, SMB, WebDAV)
- Timezone: Set your timezone for proper backup scheduling
- Volumes: Mount local directories if you need to back them up
Start ZeroByte with:
Once the container is running, access the web interface at .
Using ZeroByte
Adding Volumes
Volumes represent the source data you want to back up. To add a volume:
- Navigate to the Volumes section in the web interface
- Click Create volume
- Fill in the required details:
- Volume name
- Volume type (SMB, NFS, WebDAV, Directory, etc.)
- Connection settings (credentials, paths, etc.)
For local directories, you'll need to mount them into the ZeroByte container first by adding a volume mapping in your , then select "Directory" as the volume type in the web interface.
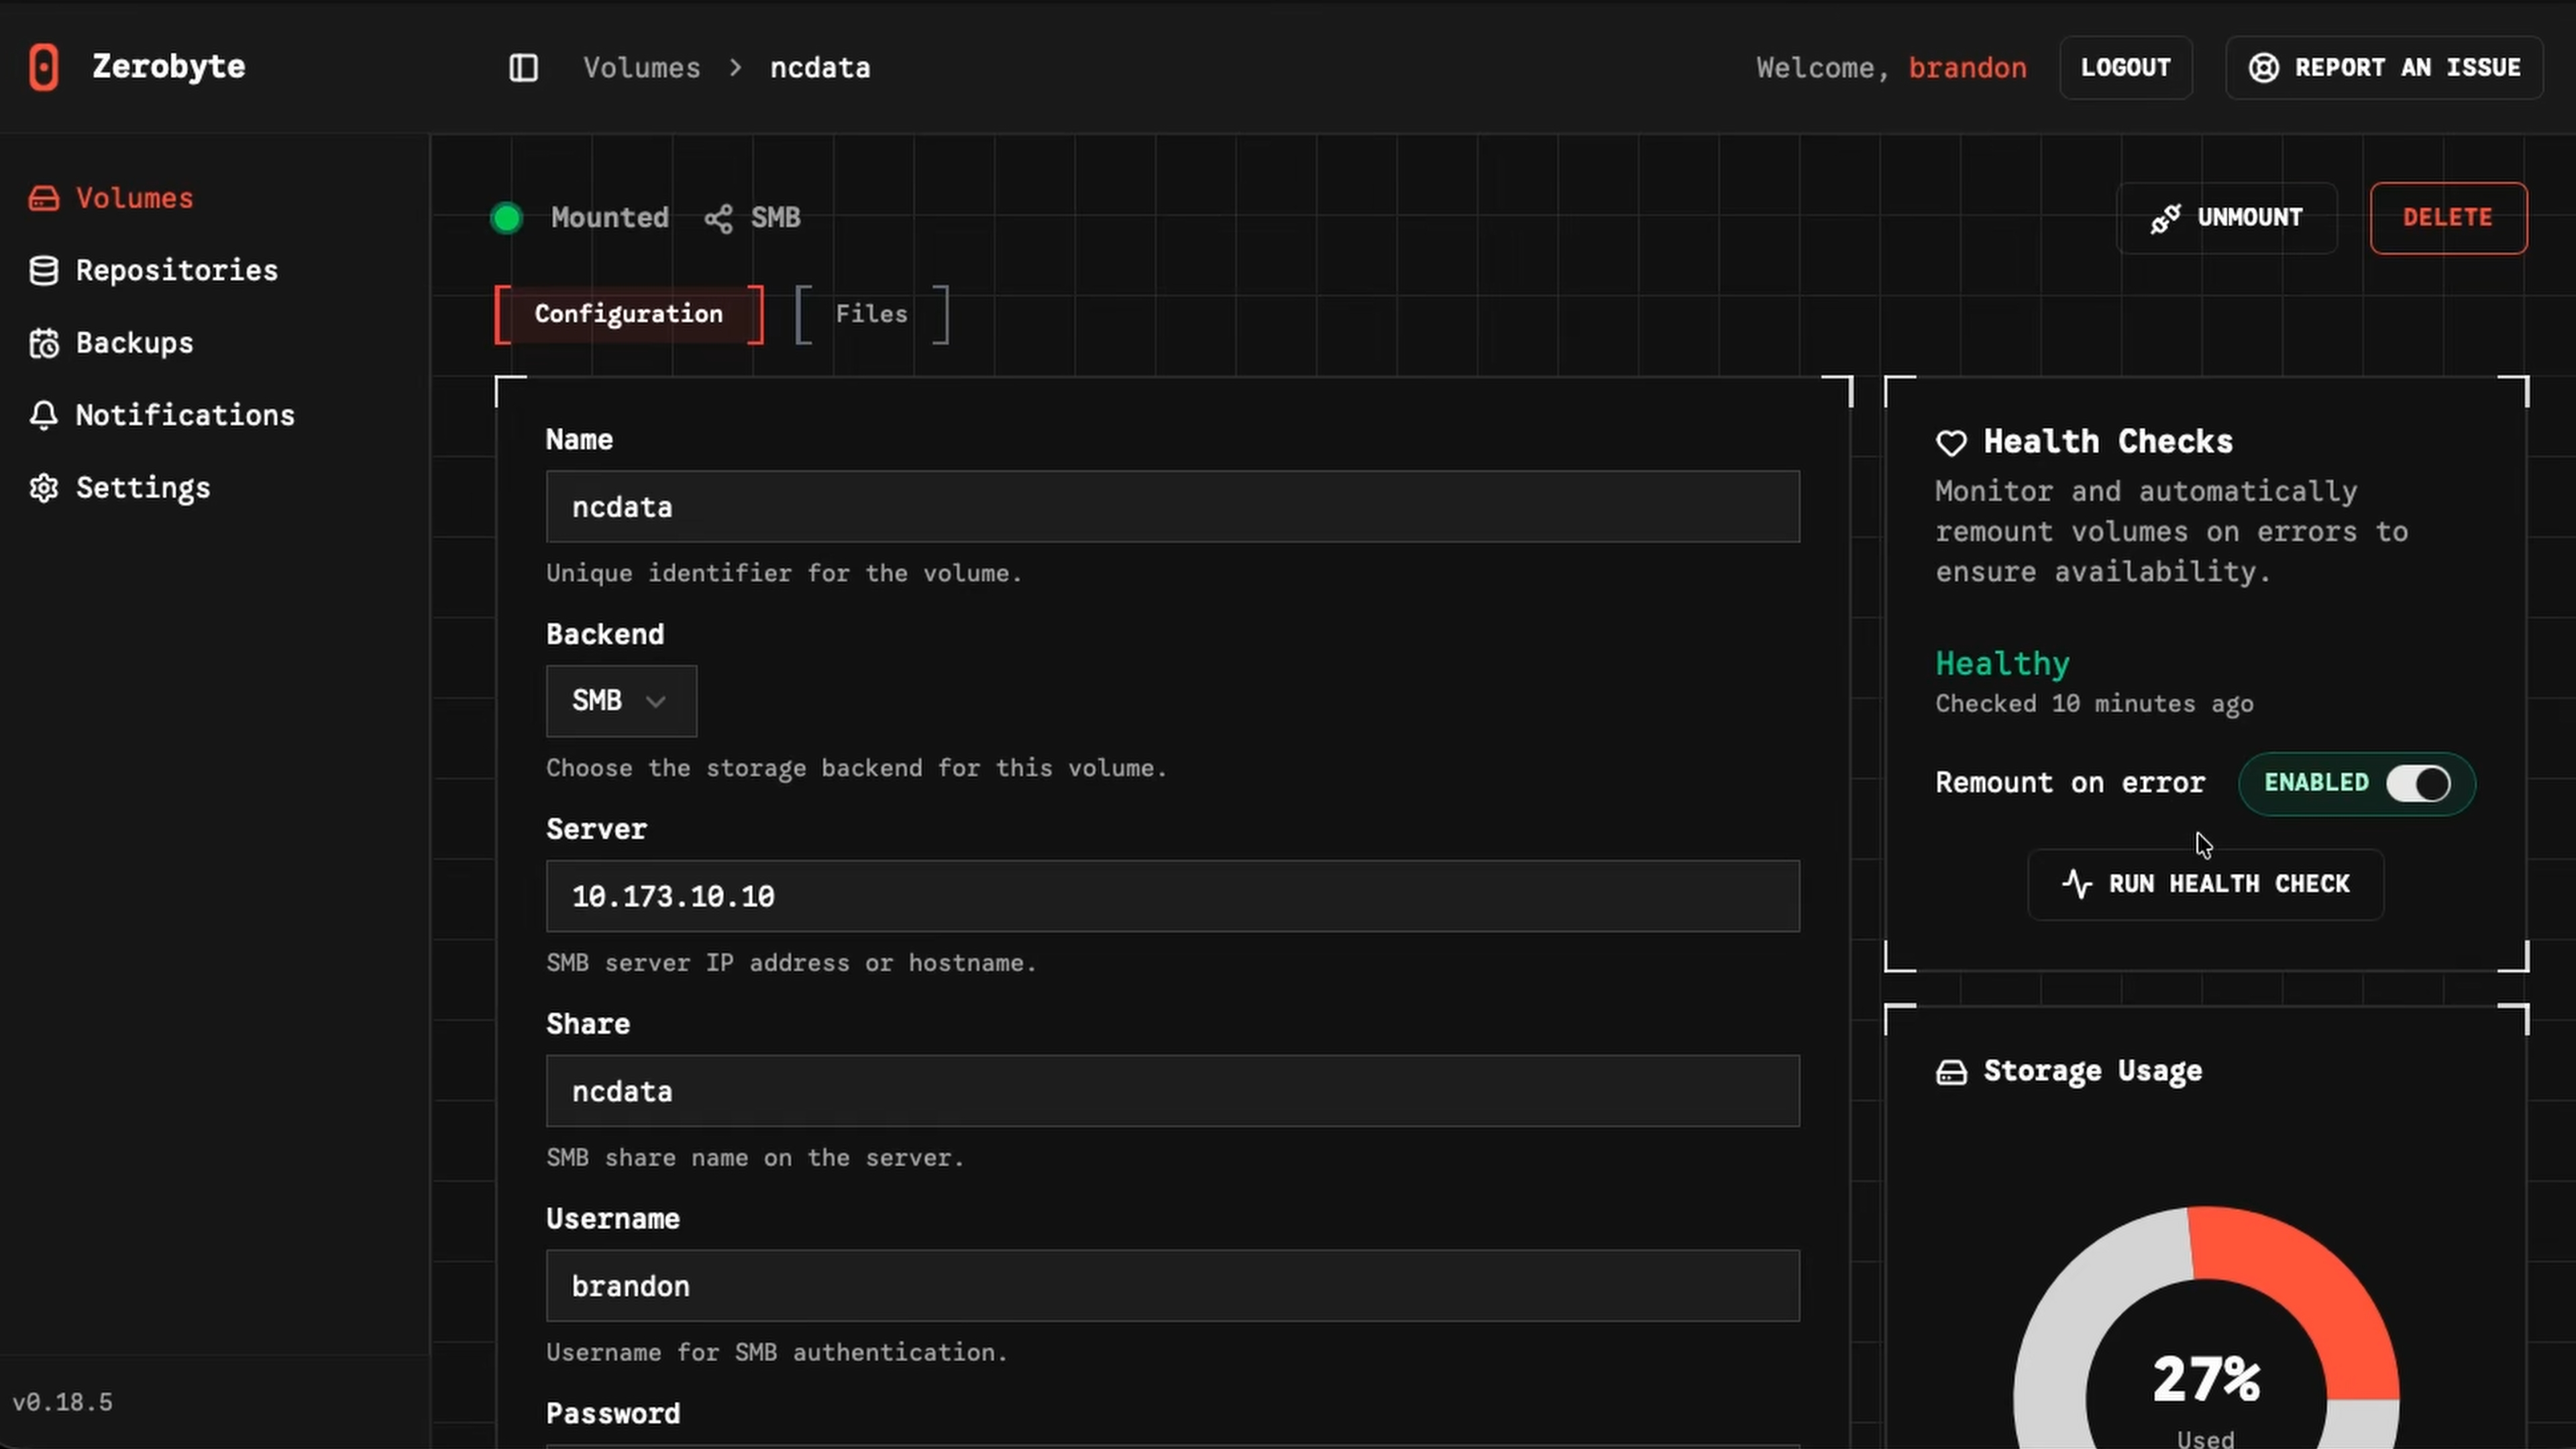
You can test connections, view storage usage, run health checks, and browse files directly from the ZeroByte interface.
Creating Repositories
Repositories are where your encrypted backups will be stored. To create a repository:
- Navigate to the Repositories section
- Click Create repository
- Select the backend type (Local, S3, REST, rclone, etc.)
- Configure connection settings
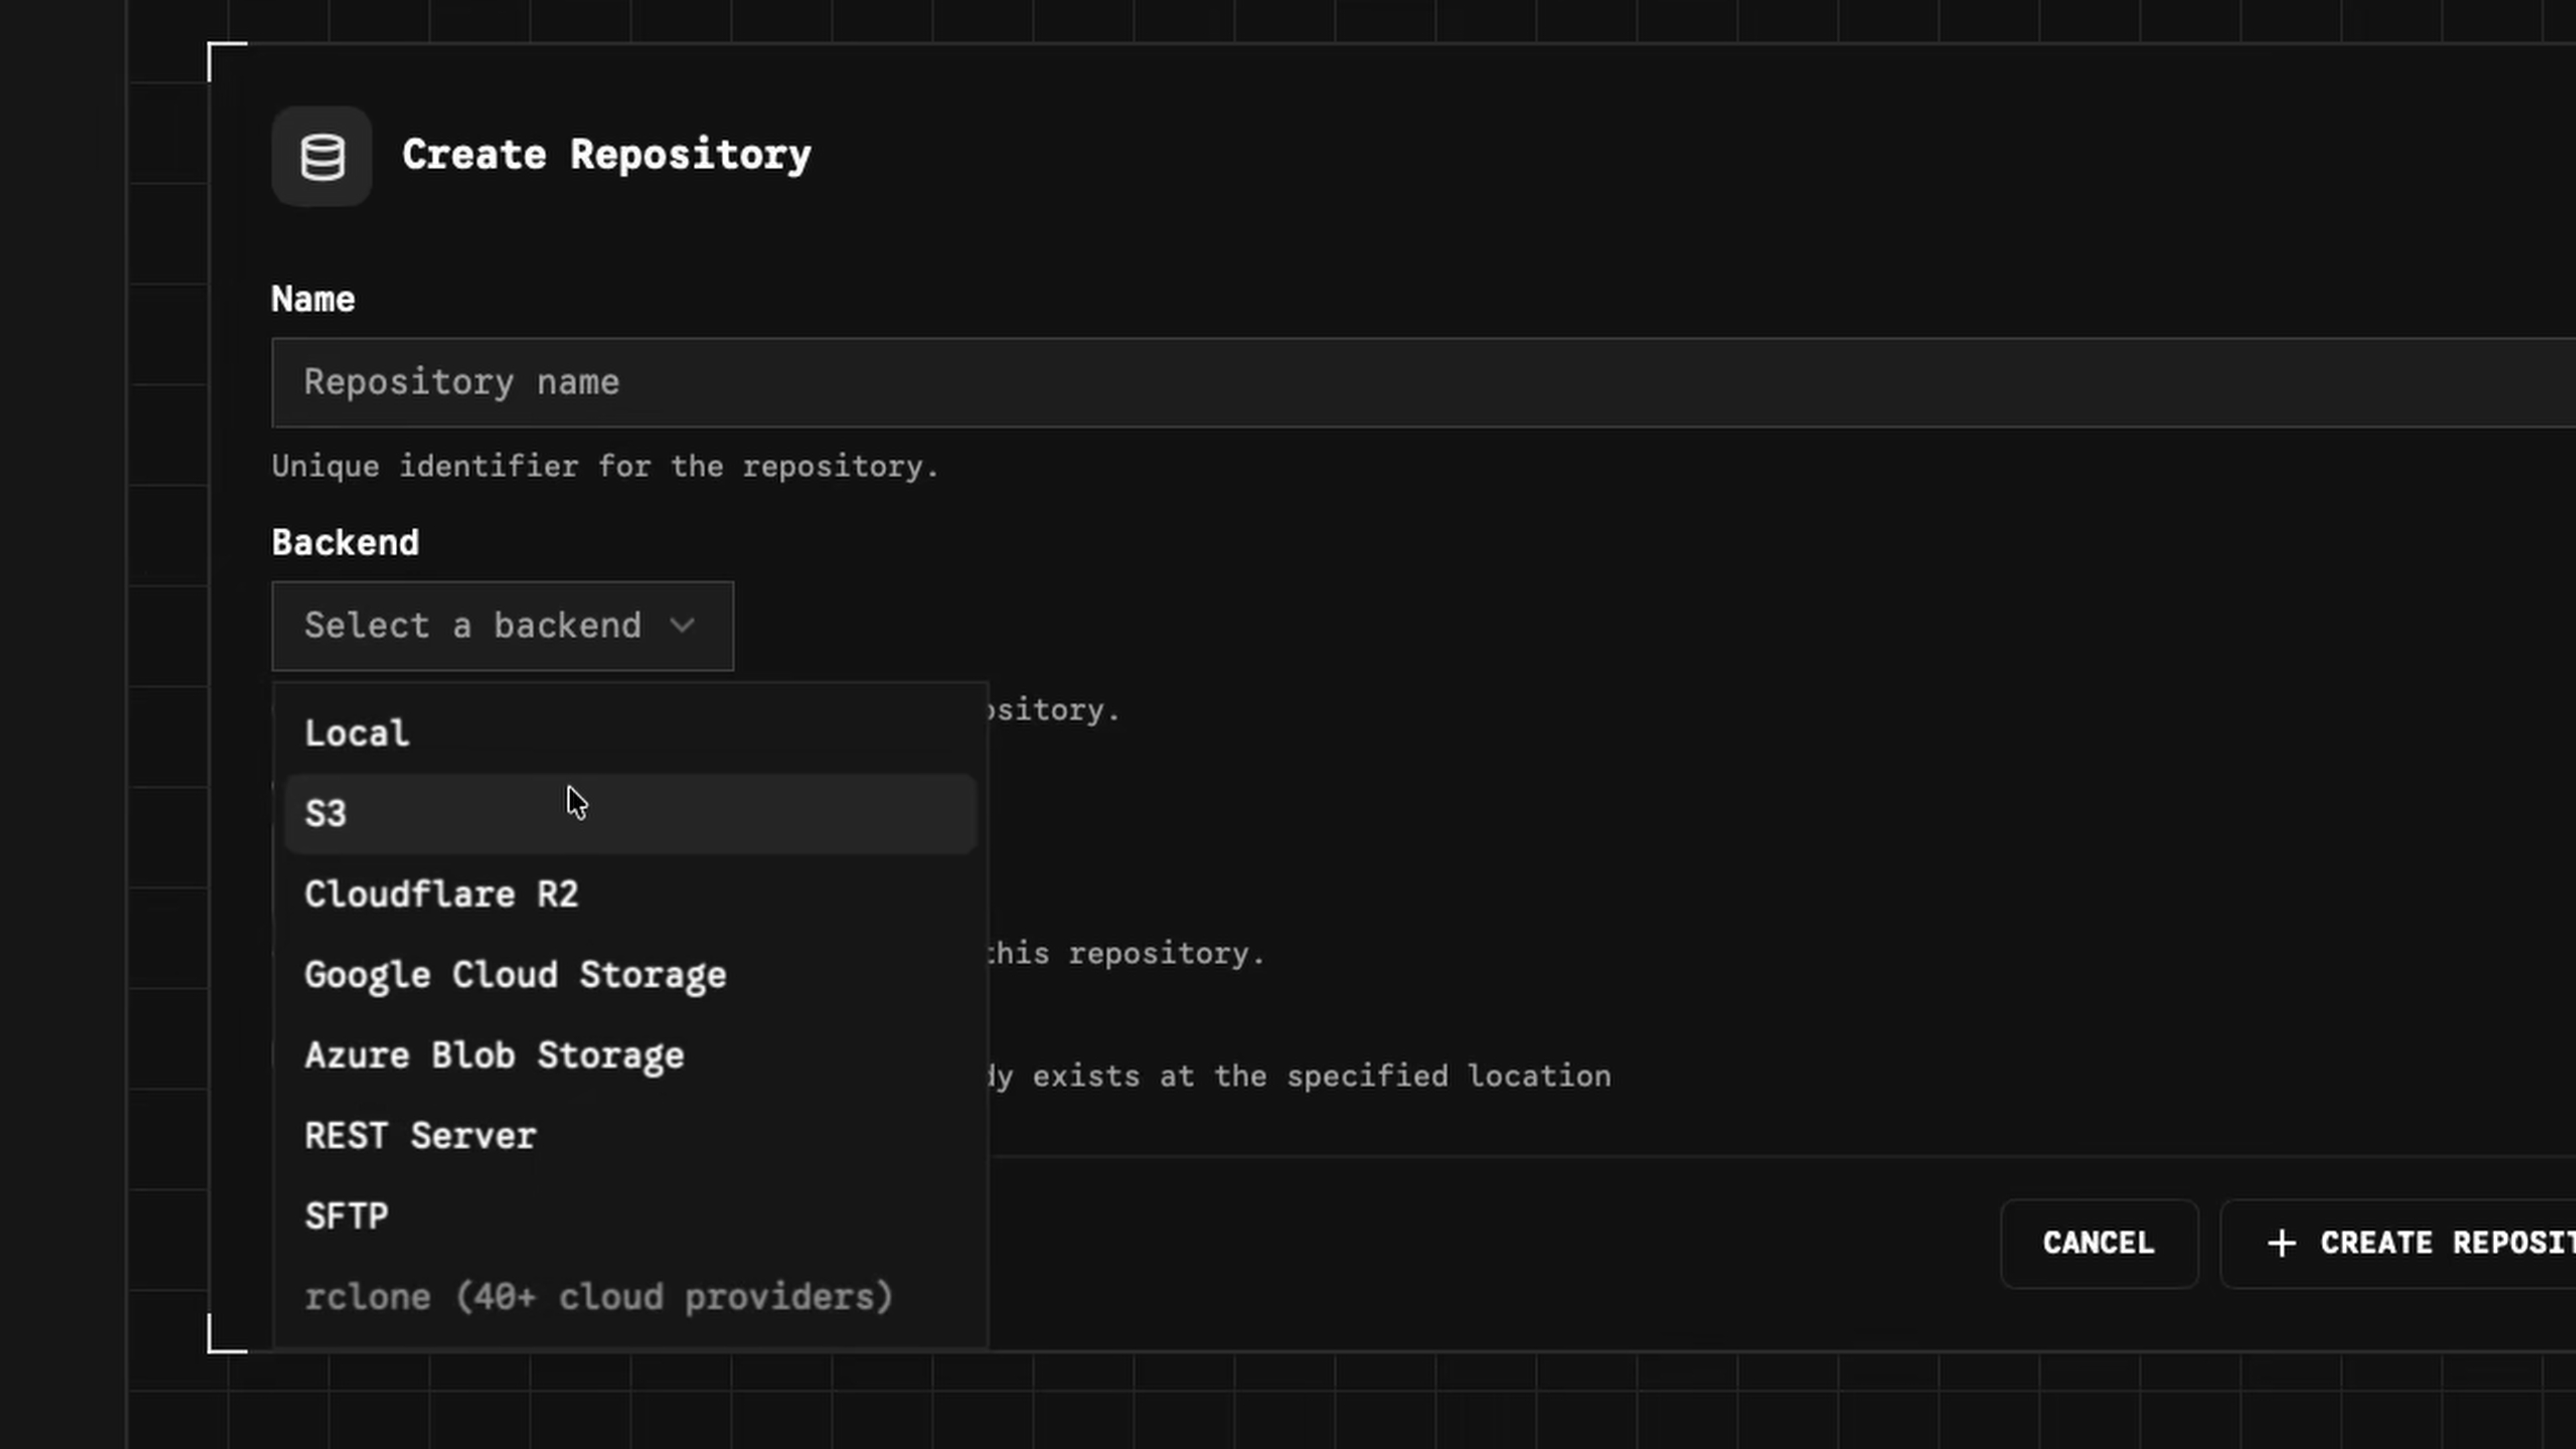
Repositories leverage Restic's deduplication and encryption features for efficient, secure storage.
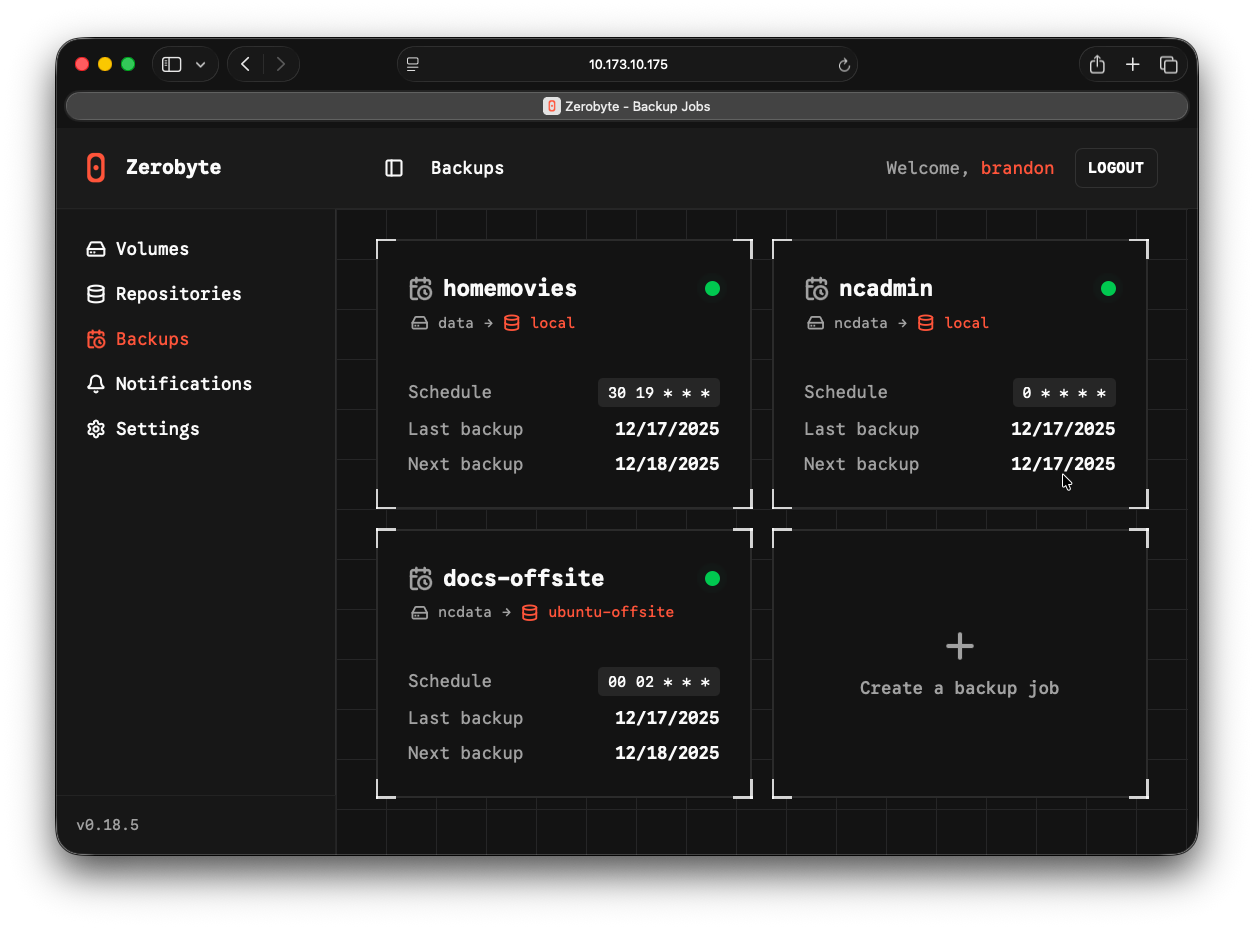
Creating Backup Jobs
Once you have volumes and repositories configured, you can create backup jobs:
- Navigate to the Backups section
- Click Create backup job
- Configure:
- Volume: Select the volume to back up
- Repository: Select where to store the backup
- Schedule: Set frequency (daily, weekly, etc.) and time
- Paths: Specify which files or directories to include
- Retention Policy: Configure snapshot retention (e.g., keep last 10 snapshots, 5 dailies, 3 weeklies, 2 monthlies)
- Exclude patterns: Optionally exclude specific files or patterns
Backup jobs will run automatically according to your schedule. You can also trigger manual backups using the "Backup Now" button.
Restoring Data
To restore data from a backup:
- Navigate to the Backups section
- Select the backup job
- Choose a snapshot
- Browse files and select what to restore
- Choose restore location (original location or custom)
- Configure restore options (overwrite mode, etc.)
ZeroByte makes it easy to restore individual files or entire directories from any snapshot.
Restic REST Server Setup on Ubuntu
In this section, we'll set up a REST server on a VPS to serve as an offsite backup destination. ZeroByte running on your local server will connect to this REST server to store backups. We'll establish the secure connection between your local server and the VPS using NetBird in the steps that follow. Note that this is just one example of how you could use NetBird with ZeroByte, and there are many other network configurations and backup strategies you could implement.
Installation
Download the latest release from GitHub on your offsite server:
Create the backup directory:
Replace with your own username in all paths and configuration files.
Option 1: No Authentication (Private Networks Only)
Use this only on trusted networks or when access is controlled by other means (VPN, firewall, NetBird, etc.).
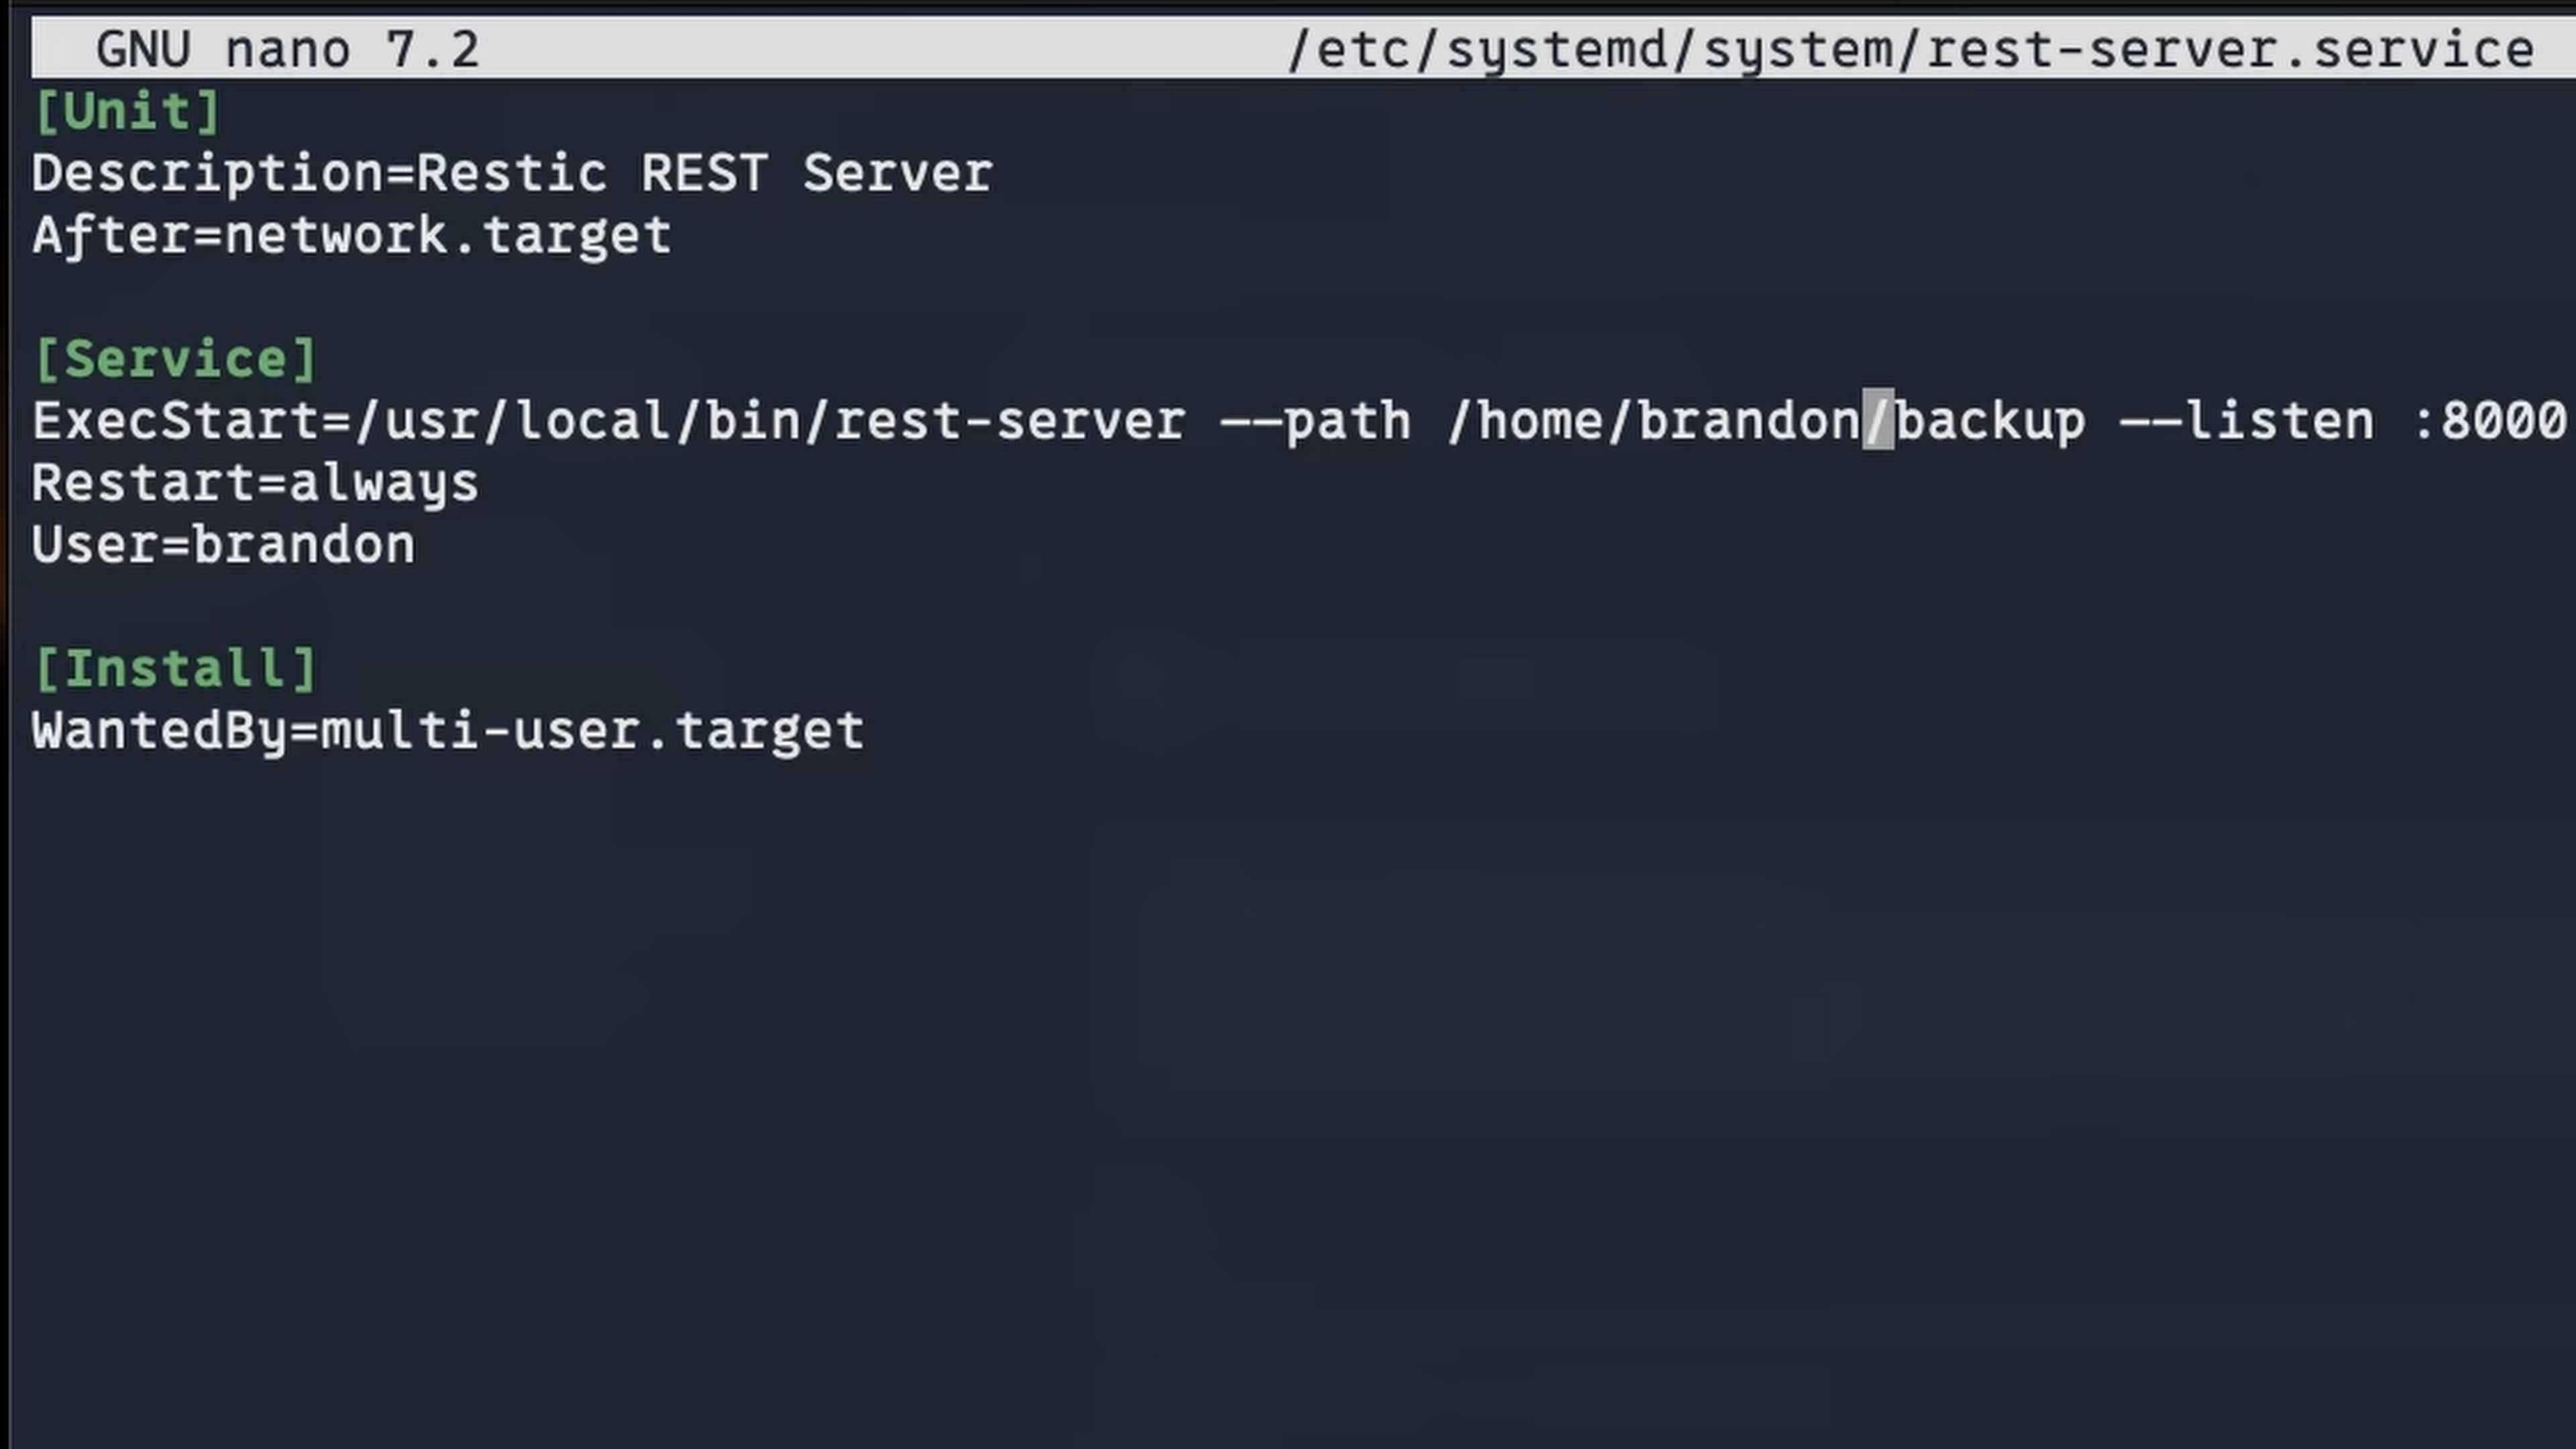
Create the systemd service at :
Enable and start:
Connect from client:
Option 2: Basic Authentication
Use this option for any network where you want an additional layer of security.
Install htpasswd utility:
Create credentials file in the backup directory:
To add additional users (omit flag):
Update the systemd service (remove ):
Reload and restart:
Connect from client with credentials:
To avoid passwords in shell history, use environment variables:
Additional Security Options
| Flag | Description |
|---|---|
| Prevents deletion of backups (ransomware protection) | |
| Users can only access repos matching their username | |
| Enable HTTPS with and | |
| Bind to localhost only (use with reverse proxy) |
Example with append-only mode:
Common issues:
- Permission denied: Ensure the backup directory is owned by the service user
- 217/USER error: The user specified in the service file doesn't exist
- Tilde not expanding: Always use absolute paths in systemd service files
- 500 errors: Check server logs for the actual error message
Verify It's Running
Integrating ZeroByte with NetBird for Offsite Backups
NetBird provides a secure, peer-to-peer encrypted connection between your machines without needing to expose ports or configure complex firewall rules. This makes it ideal for securely connecting your ZeroByte instance to a remote REST server for offsite backups.
Step 1: Install NetBird on Both Machines
On your offsite server (where REST server is running), install NetBird:
On your ZeroByte server, install NetBird using a setup key from the NetBird dashboard:
- Go to the NetBird dashboard → Setup Keys
- Create a new setup key (e.g., "ZeroByte Server")
- Add it to a group (e.g., "zerobyte")
- Copy the installation command and run it on your ZeroByte server
- Do the same for your offsite REST server
After installation, run to connect.
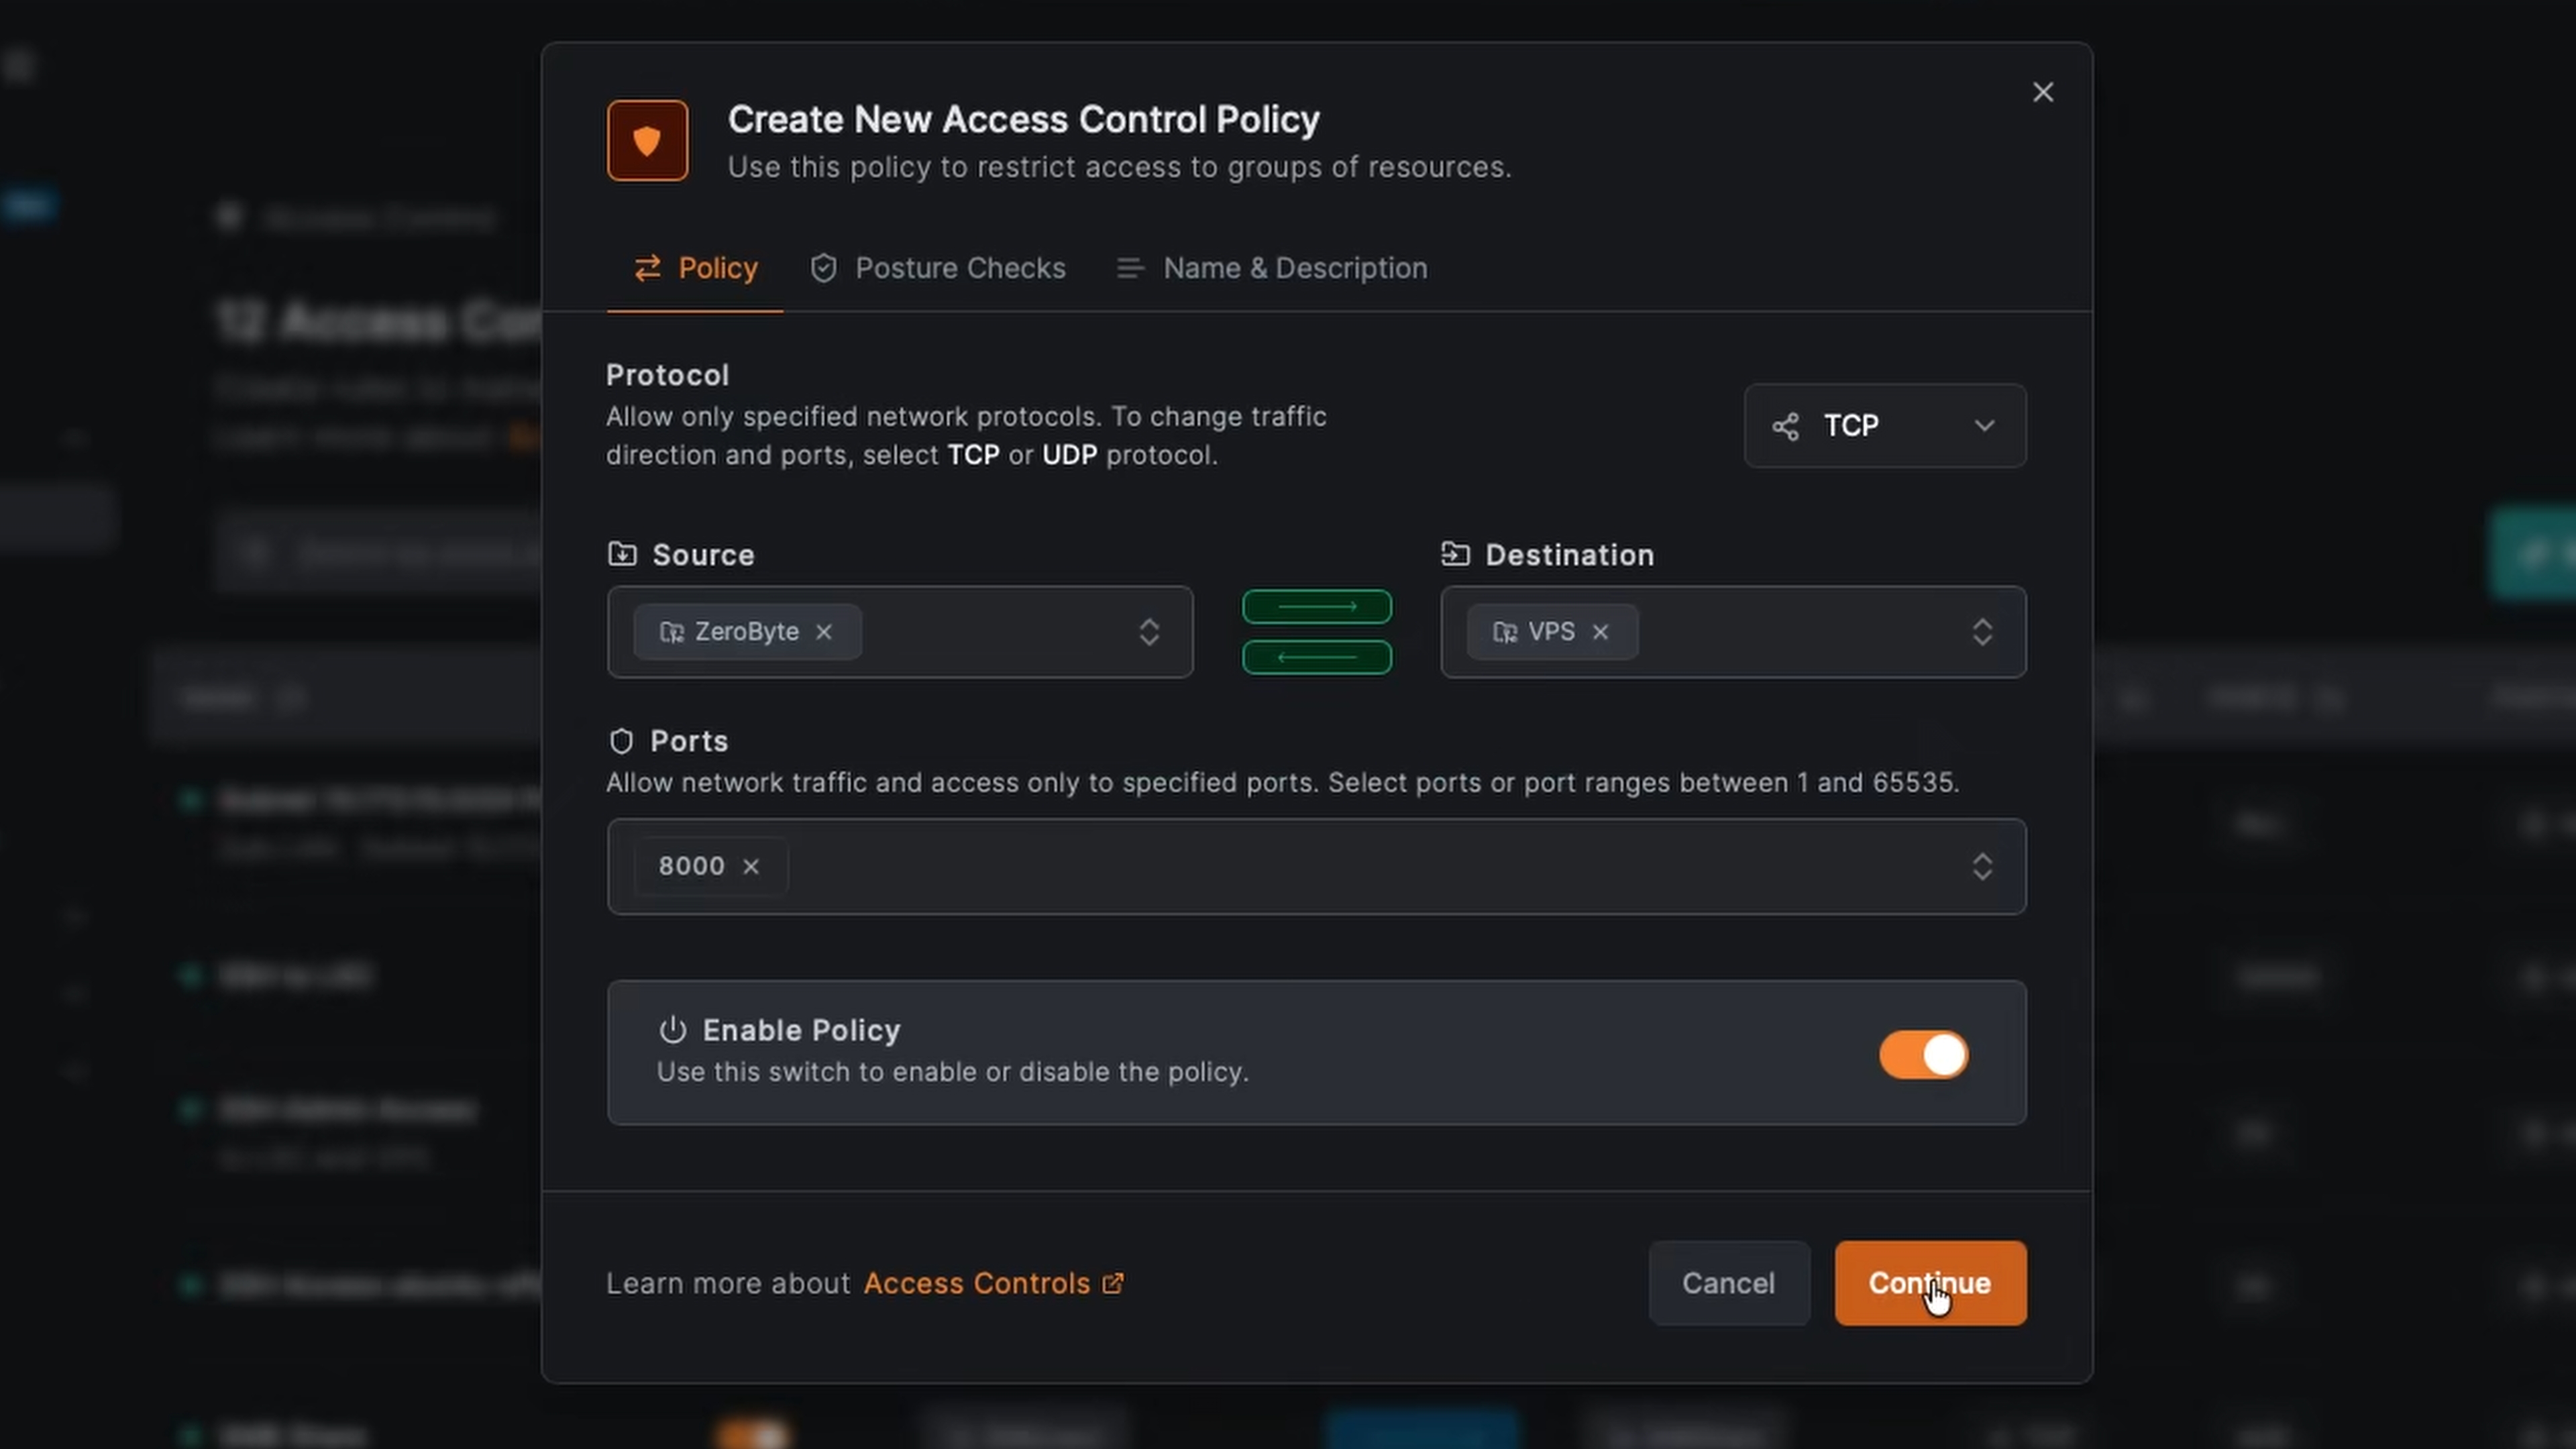
Step 2: Create NetBird Policy
In the NetBird dashboard:
- Navigate to Policies
- Click Add Policy
- Configure:
- Source: Select your ZeroByte group or peer
- Destination: Select your offsite server group or peer
- Protocol: TCP
- Port: 8000 (or the port your REST server uses)
- Save the policy (e.g., "ZeroByte to VPS")
This allows your ZeroByte server to communicate with the REST server on your offsite machine through the NetBird VPN connection.
Step 3: Create REST Repository in ZeroByte
- In ZeroByte, navigate to Repositories
- Click Create repository
- Select REST as the backend type
- Configure:
- Name: e.g., "Ubuntu Offsite"
- REST URL: Use the NetBird DNS name (e.g., )
- Repository Path: Leave empty for root, or specify a path
- Username/Password: Leave empty if using , or provide credentials if using authentication
The repository should now show as healthy and connected through the NetBird VPN.
Step 4: Create Offsite Backup Job
- Navigate to Backups in ZeroByte
- Click Create backup job
- Configure:
- Volume: Select the volume you want to back up
- Repository: Select your REST repository (e.g., "Ubuntu Offsite")
- Schedule: Set your desired frequency (e.g., daily at 12:30 PM)
- Paths: Select specific directories to back up
- Retention Policy: Configure snapshot retention (e.g., last 10 snapshots, 5 dailies, 3 weeklies, 2 monthlies)
- Save the backup job
You can trigger a manual backup immediately using the "Backup Now" button, or wait for the scheduled backup to run.
Benefits of This Setup
This configuration provides several advantages:
- No Open Ports: The REST server doesn't need to be exposed to the internet. NetBird handles the secure connection.
- Encrypted Connection: NetBird provides peer-to-peer encrypted VPN connectivity between your machines.
- End-to-End Encryption: Restic encrypts your backup data, providing an additional layer of security.
- 3-2-1 Backup Strategy: This setup supports the 3-2-1 backup methodology:
- 3 copies of your data
- 2 different media types
- 1 offsite backup (your offsite REST server via NetBird)
- Easy Management: ZeroByte's web interface makes it simple to manage backups, schedules, and restores.
For production use, remember to:
- Enable authentication on your REST server
- Consider using HTTPS/TLS for additional security
- Implement proper retention policies
- Monitor backup job status regularly
- Test restore procedures periodically
- Use ZeroByte in addition to another backup platform as it is in early stages of development