
A site-to-site virtual private network (VPN) is a secure, encrypted tunnel between two distant environments. For example, when you host a database server in the cloud, one way to enhance its security and integrity is by disabling its public-facing IP. This makes it inaccessible from outside the private network and reduces the network attack surface. While employees can access the server through a remote access solution like VPN, a site-to-site VPN is particularly useful for connecting entire networks across different locations, ensuring workloads can communicate securely with the database server.
In this article, you'll learn how to set up a site-to-site VPN to connect to an Amazon Virtual Private Cloud (Amazon VPC) from your on-premise environments. While this tutorial will help you achieve this connection, remember that one of the steps involves setting up a customer gateway , which may require access to Amazon Web Services (AWS) Identity and Access Management (IAM) .
Site-to-Site VPN: Why You Need One
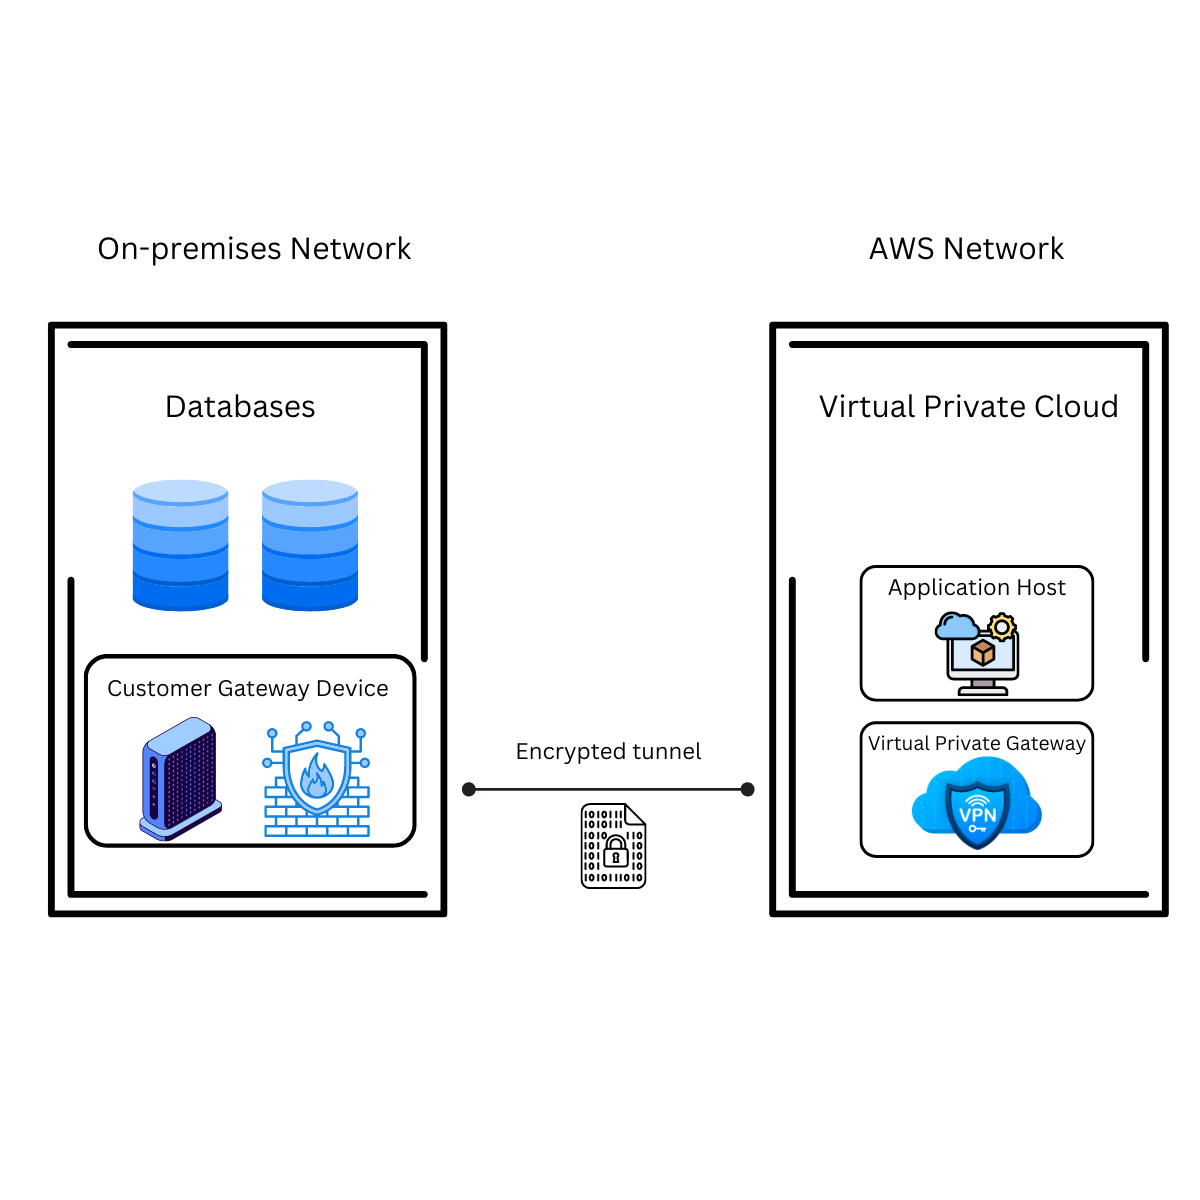
If you're managing an on-premise network where your critical databases reside but your applications, which rely on this data, are running on the AWS cloud, securely connecting your on-premise network to the cloud is challenging. You need a reliable and secure way to ensure that your applications can seamlessly access the on-premise databases without exposing them to potential security threats.
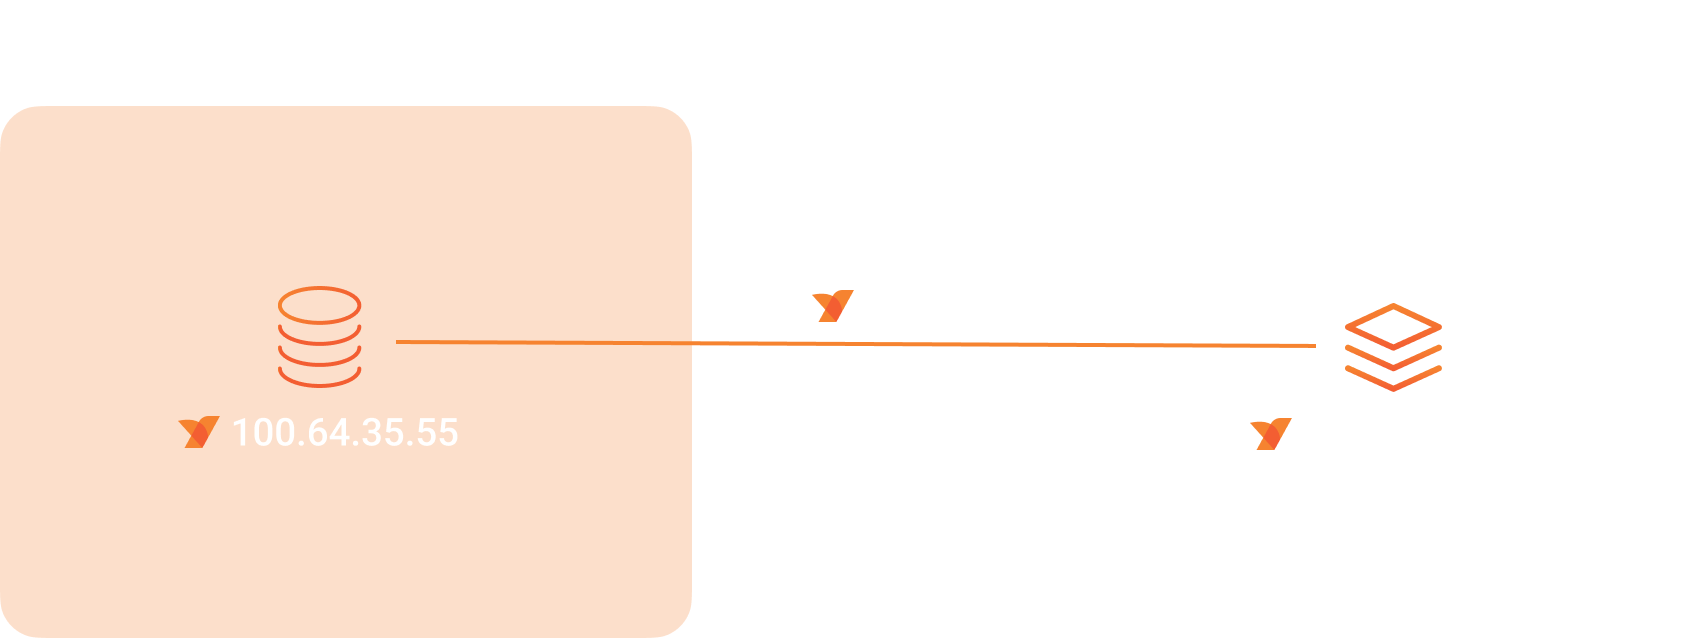
Setting up a site-to-site VPN creates an encrypted tunnel between your on-premise network and AWS. Therefore, your applications can securely access the databases as if they were part of the same local network, ensuring data integrity and security:
Implement AWS Site-to-Site VPN
Setting up a site-to-site VPN on AWS isn't easy. It involves several gateway setups and configurations that can be difficult for anyone unfamiliar with AWS or site-to-site VPN setups in general.
Here's a brief overview of the steps you'll complete to configure your site-to-site VPN:
- Create a customer gateway
- Create a virtual private gateway
- Configure your routing
- Update your security group
- Create a VPN connection
Create a Customer Gateway
The initial step in configuring your site-to-site VPN is to create a customer gateway. The customer gateway represents your on-premise device or software application and establishes the VPN connection with AWS. It defines the external IP address and routing information that AWS needs to connect to your on-premise network.
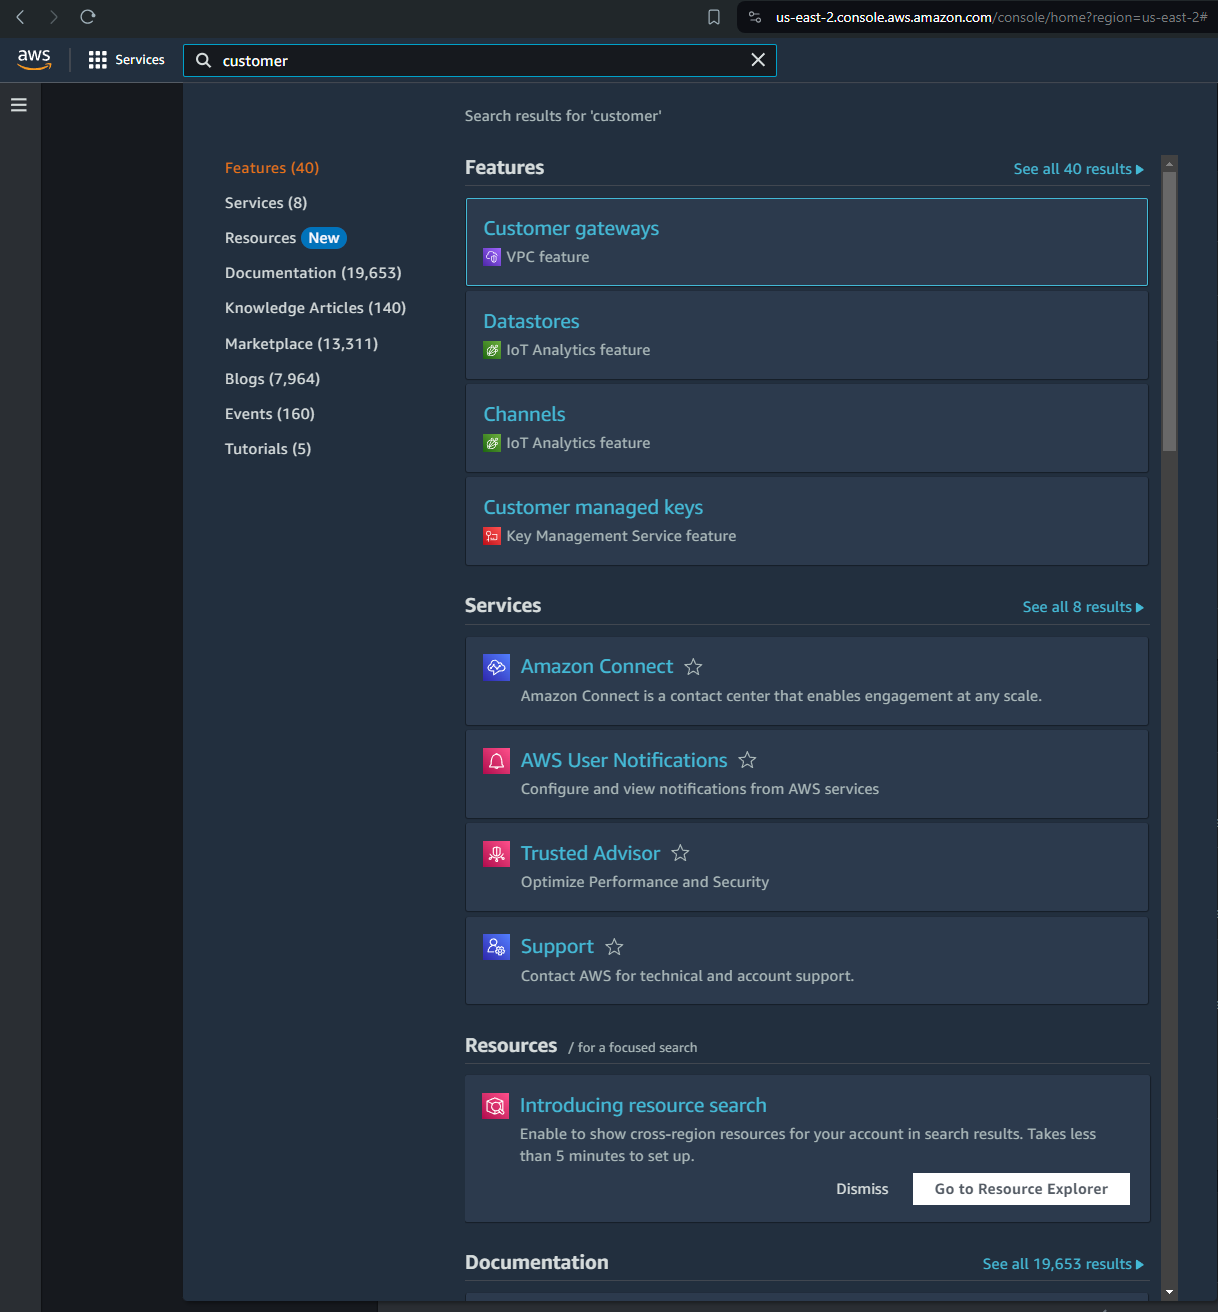
To create this gateway, you need to access your AWS Management Console, navigate to the Virtual Private Cloud dashboard , and select Customer gateways:
Click Create customer gateway and follow the prompts to configure your gateway according to your on-premise network:

Create a Virtual Private Gateway
After you've created your customer gateway, you need to create a virtual private gateway, which acts as the VPN concentrator on the AWS side of the VPN connection. This enables communication between your AWS VPC and your on-premise network and serves as the entry point for your VPN connection with AWS.
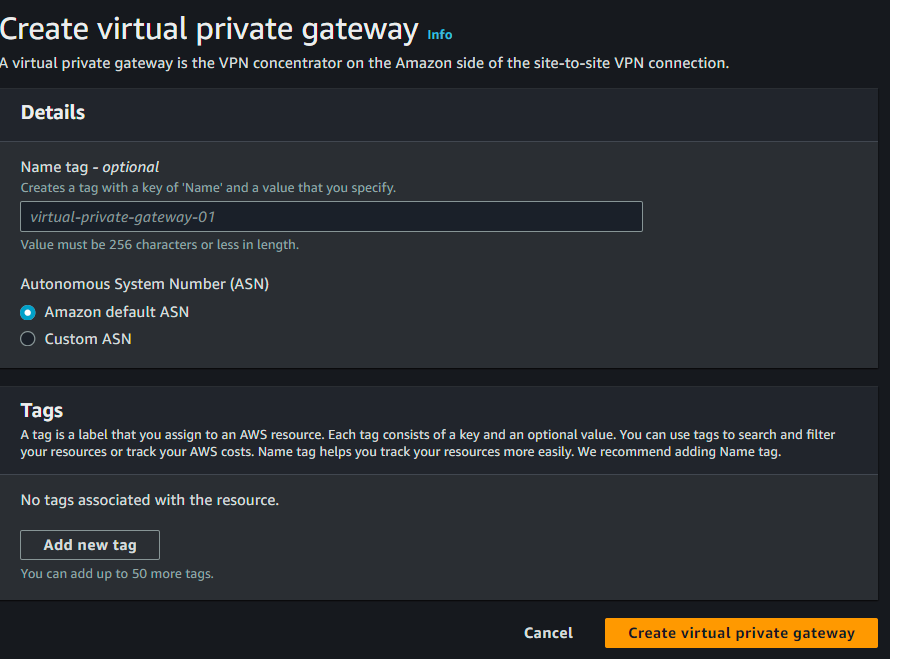
As you did in the previous step, access the AWS Management Console, navigate to the VPC Dashboard, and select Virtual Private Gateways. Then, click Create virtual private gateway and give the VPN a name. Unless you have a custom autonomous system number , leave that field with the default values:
Configure Your Routing
Configuring your routing ensures that network traffic knows how to travel between your on-premise network and your AWS VPC. This step sets up the route tables that direct the VPN traffic correctly, ensuring seamless communication between the two environments.
Navigate to the AWS Management Console > VPC dashboard and select Route tables. Select the route table associated with your subnet. Then click Edit route propagation. Select the virtual private gateway that you created in the previous step and then save it:
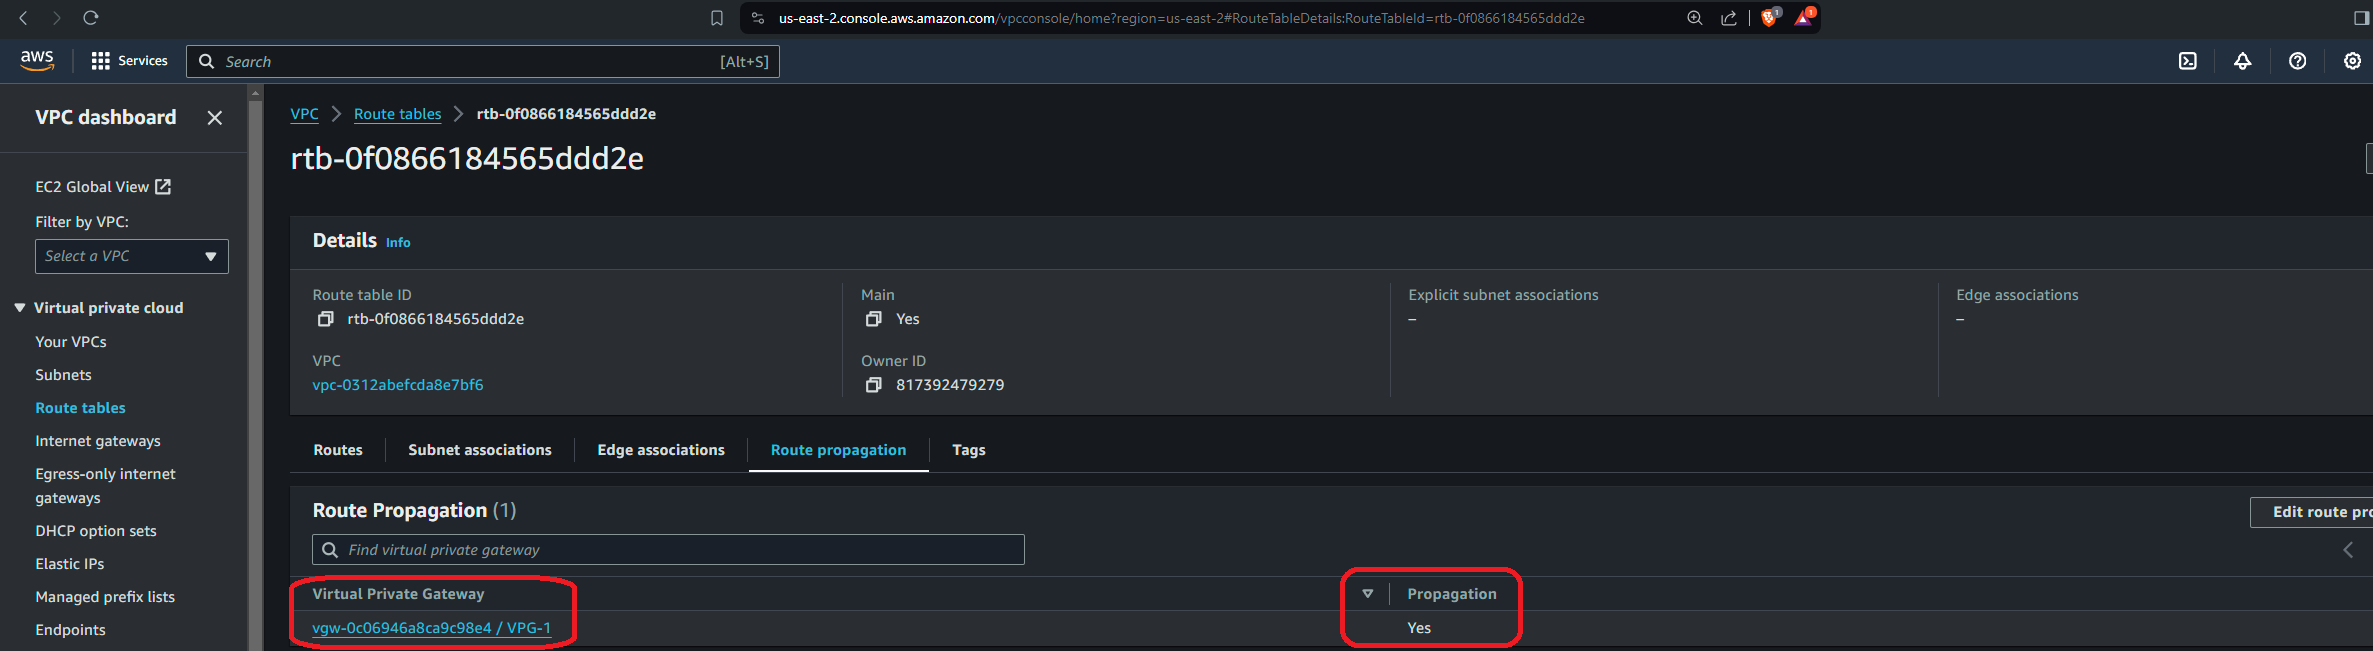
You should see the route table associated with the subnet you're using to set up the site-to-site VPN, and there shouldn't be any other. Therefore, simply check the Enable box under Propagation:
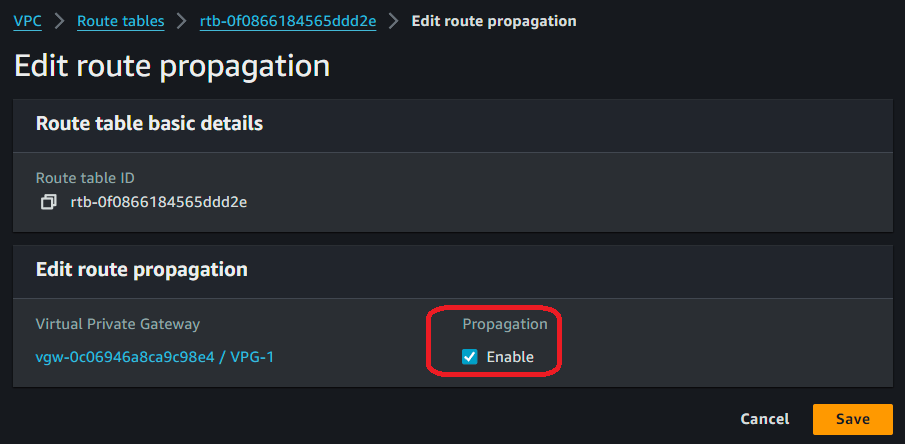
In addition, make sure your virtual private gateway displays as Attached; otherwise, you won't be able to propagate it. In the following screen capture, the virtual private gateway shows its attachment status:

Update Your Security Group
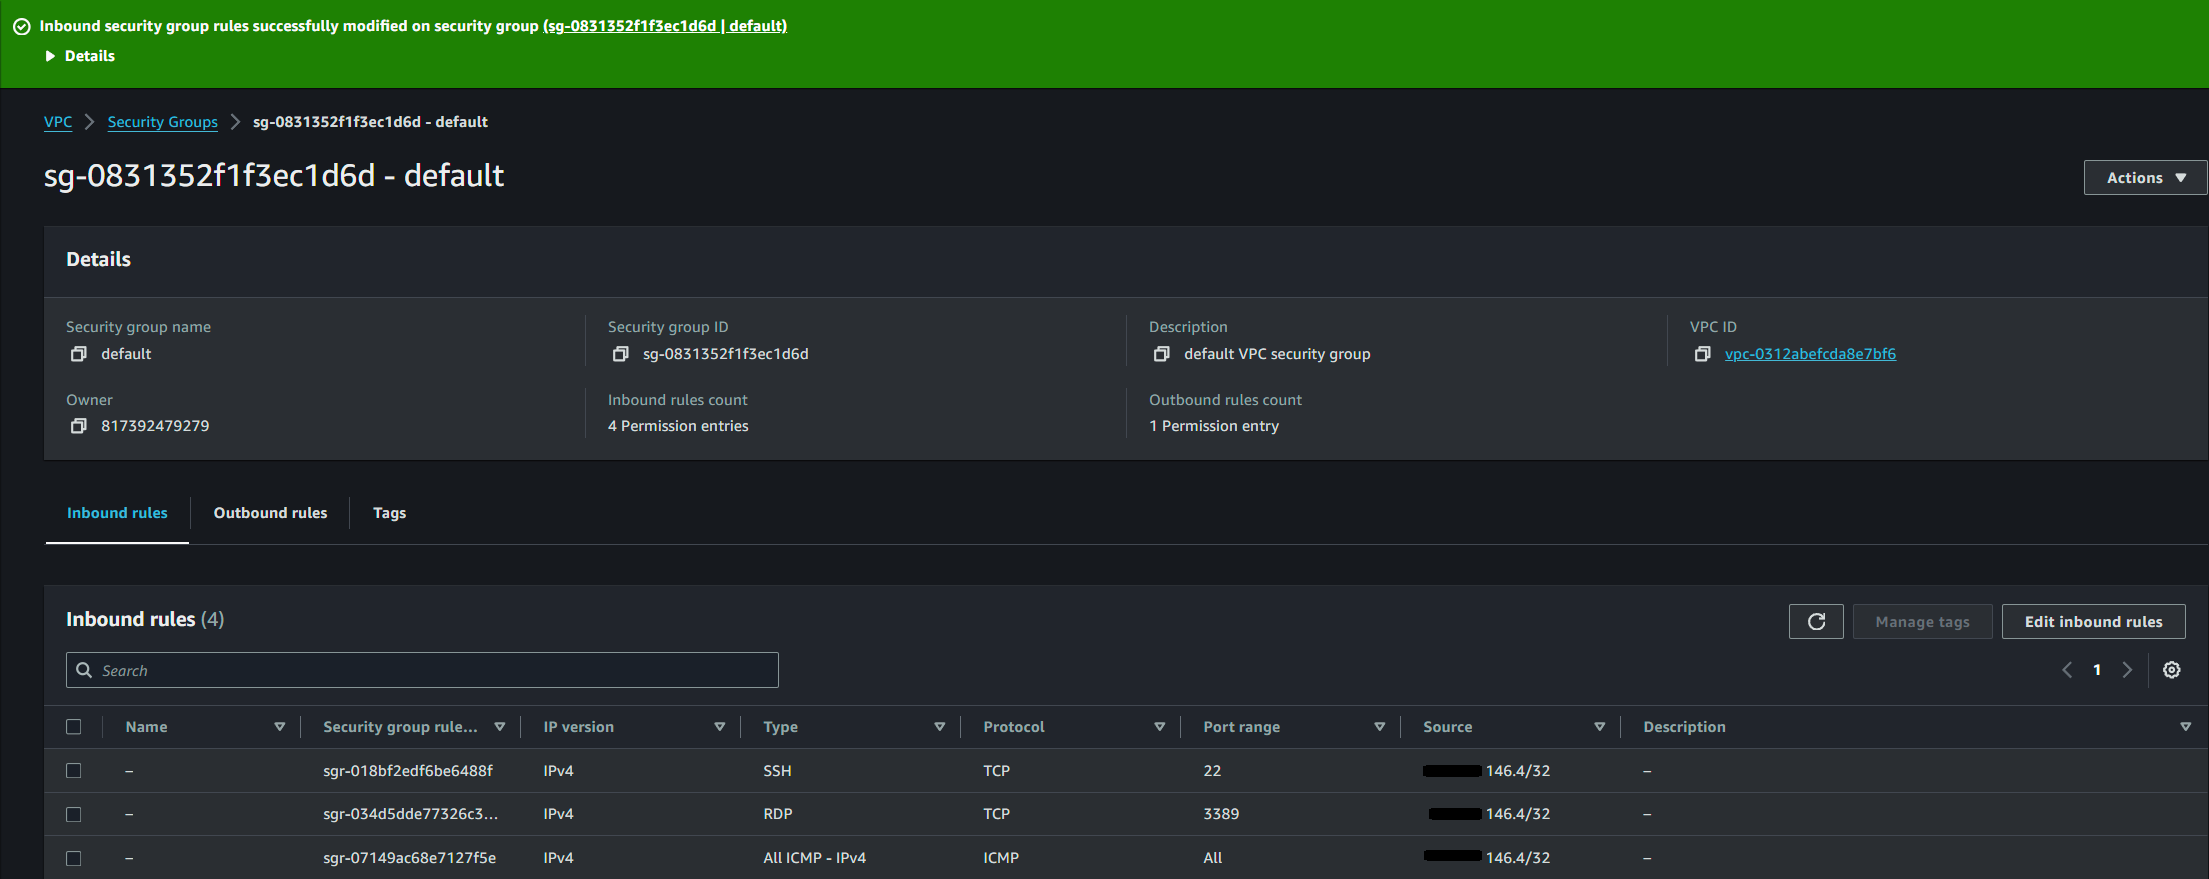
To ensure that only the intended traffic is allowed through your VPN connection, you need to update your security group. Security groups act as virtual firewalls for your instances, controlling inbound and outbound traffic.
In the AWS Management Console, navigate to the EC2 Dashboard, select Security Groups, and update the rules to allow the relevant traffic (eg SSH, RDP, database ports) from your on-premise network's IP range:
Create a VPN Connection
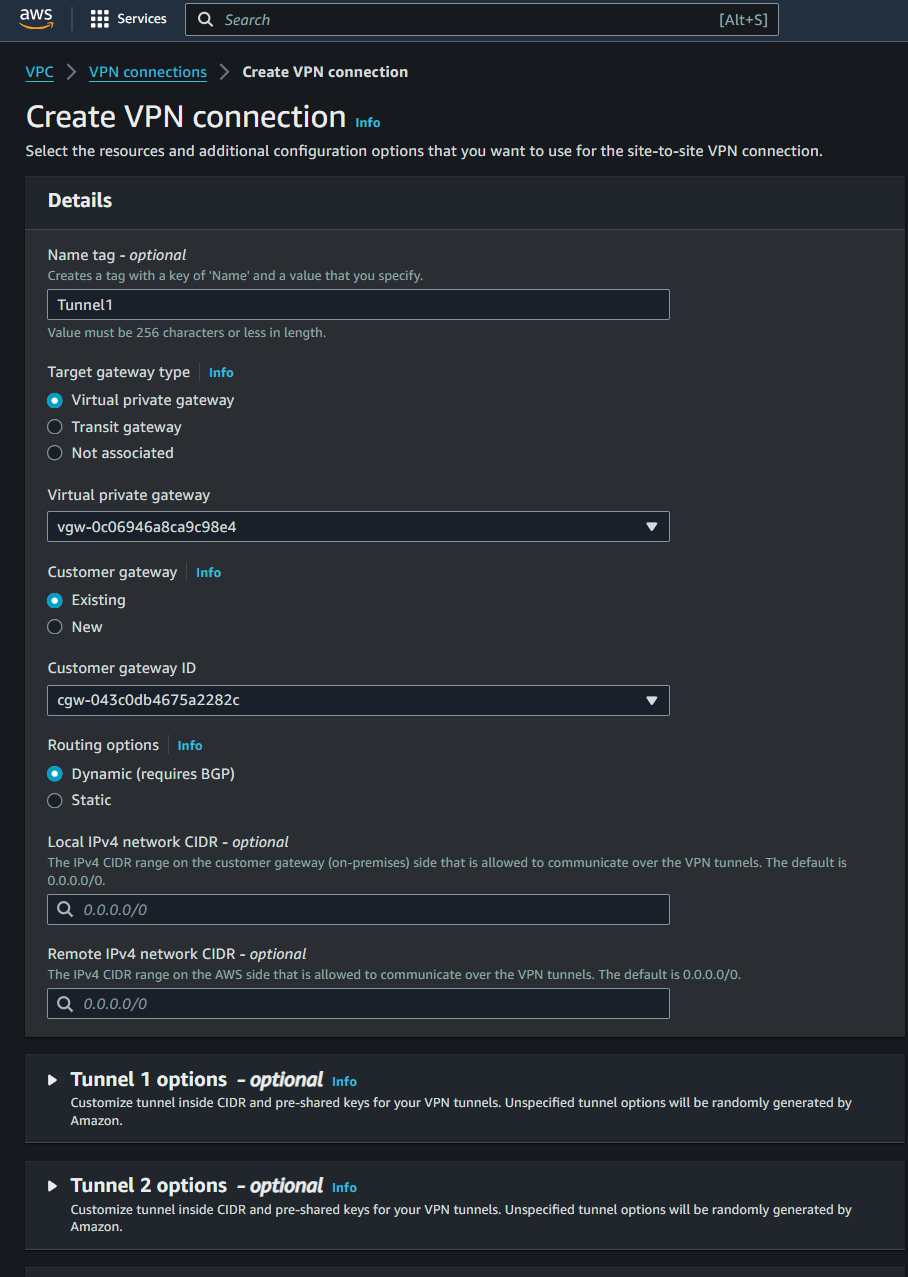
Creating a VPN connection is a pivotal step in the site-to-site VPN process as it establishes the secure tunnel between your on-premise network and AWS. This connection encrypts data traffic and ensures secure communication across the internet.
To create a VPN connection, go to the AWS Management Console, navigate to the VPC Dashboard, and select VPN connections. Click Create VPN connection, configure the connection using the previously created virtual private gateway and customer gateway, and set up the necessary routing options according to your network and needs:
The final step on the AWS side of things is to download the configuration file. This file provides the necessary settings to establish the VPN connection on your on-premise device, including details like IP addresses, preshared keys, and other parameters required for the VPN setup.
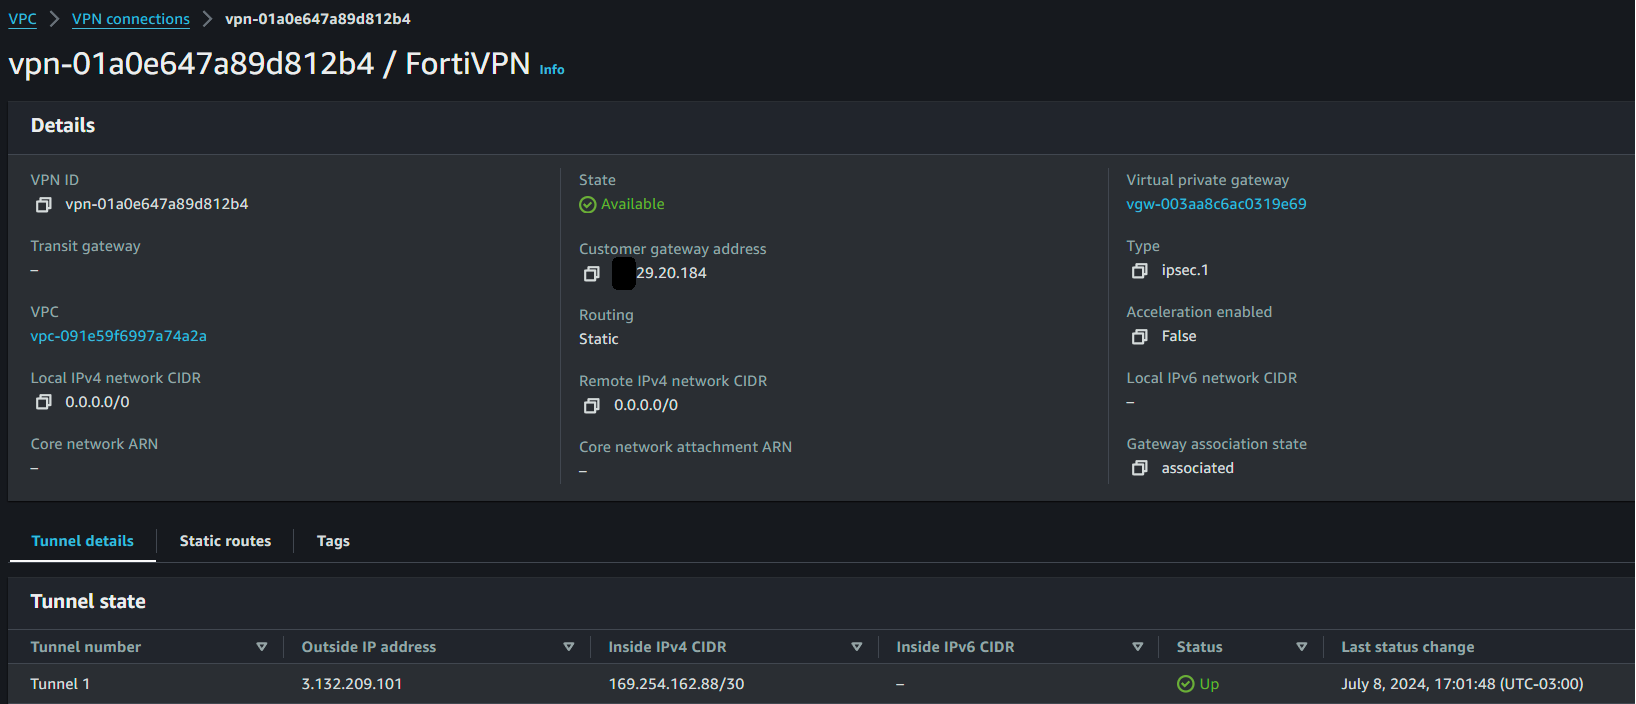
After creating the VPN connection on the last step, you'll be greeted with the following panel:

Simply click the VPN ID, and you'll be shown its details:
Click the Download configuration button on the right and choose the type of networking appliance that best fits your networking setup. You can choose Generic if yours doesn't show up.
All that's left is to load the configuration file on your hardware (or software) to be able to securely connect to your VPC from your on-premise environment.
Connect to Your Resources
For this tutorial, a FortiGate 60F appliance is used to establish the connection with AWS from the on-premise network. It's worth noting that configuring the appliance with the downloaded VPN configuration is not difficult. For the VPN tunnel to actually work, network access control lists, security groups, and static IPs have to be set up to allow the traffic coming from the on-premise network toward AWS. Even then, additional steps have to be taken since the appliance needed specific Diffie-Hellman configurations and AWS needed the correct encryption and authentication algorithms set up. While doing this, you can occasionally collide with other security policies at the organizational level, which might also become an obstacle.
By default, inbound Internet Control Message Protocol (ICMP) echo is not allowed on AWS instances; it's easier to connect to the instances initially instead of trying to reach them through ICMP . For this article, two virtual machines (VMs) were set up. A Windows Server 2022 and an Ubuntu 20.04 LTS.
Following, you will see part of the configuration that took place at the network appliance level and an established connection toward the Windows Server VM from the on-premise network:
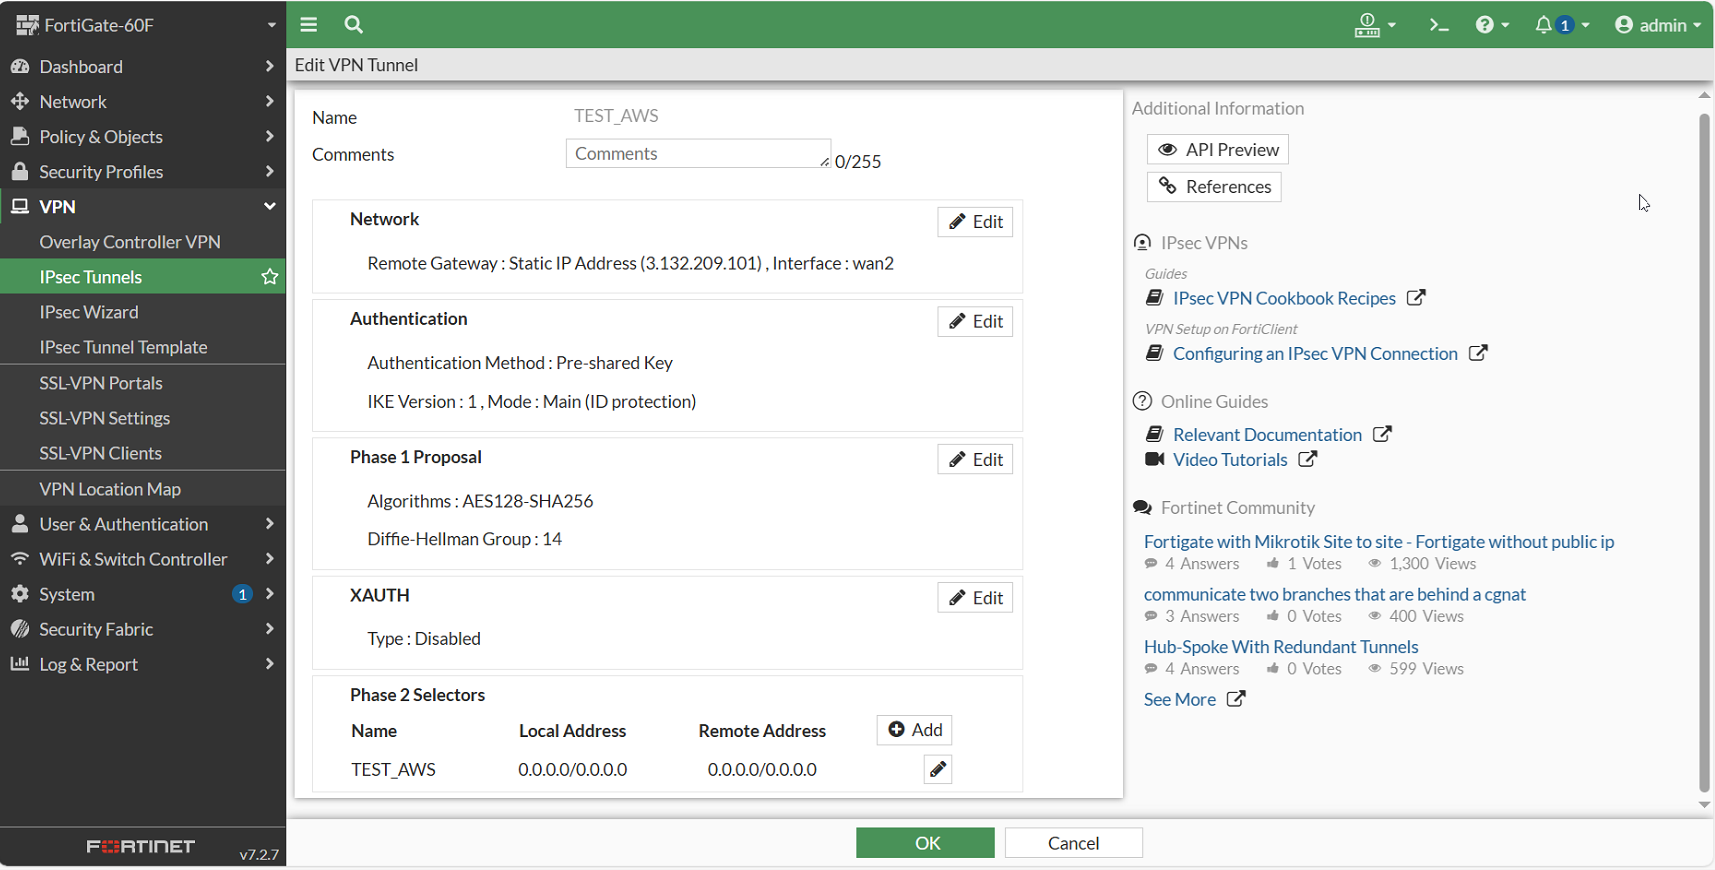
A connection with the Windows Server VM was established:

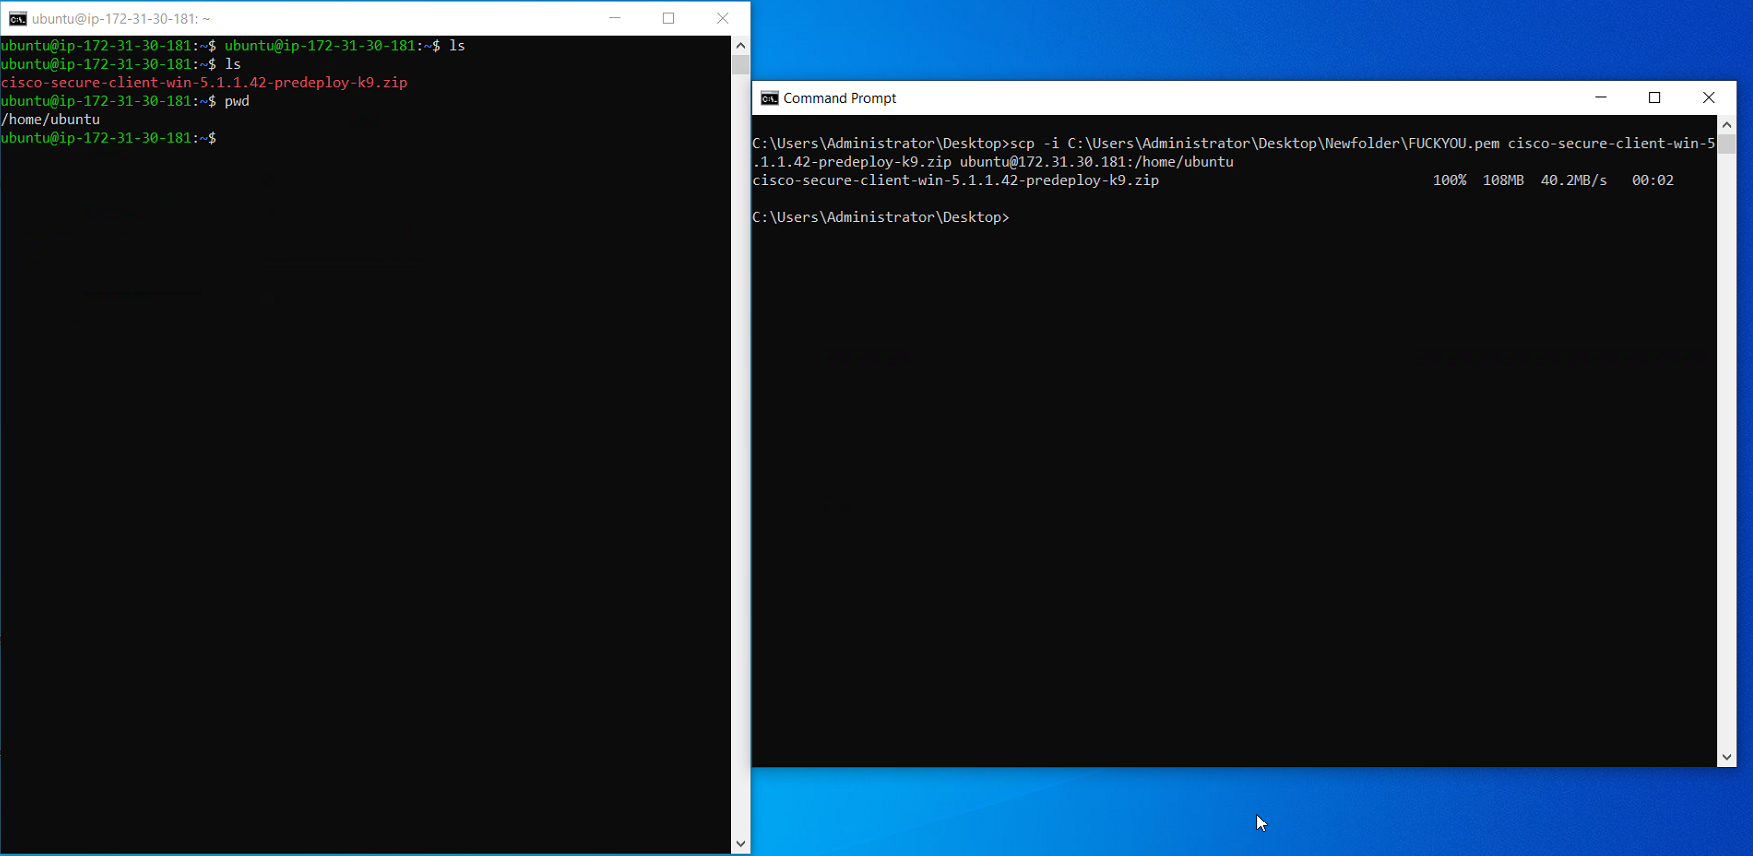
In addition, the connection was further tested by copying a file from the on-premise computer to the Ubuntu VM on AWS:
As you can see, deploying VPC features to set up the VPN on AWS is easy if you follow their documentation. However, making it work and being able to bring up the tunnel and connect to the resources are completely different stories. It gets worse if you've never worked with VPNs before or if you are not well-versed in AWS.
Connect On-Premise to AWS Without the Hassle
NetBird offers a powerful and user-friendly alternative for creating and managing site-to-site VPNs. By leveraging advanced technologies like WireGuard and zero-trust principles, NetBird simplifies the setup and maintenance of secure connections between different environments.
Setting up NetBird is significantly easier compared to traditional AWS site-to-site VPN configurations. With NetBird, you can connect machines directly without configuring the entire network. For instance, you can directly connect a database server on-premise to a web server in the cloud by installing the NetBird agent on both machines. The agents will discover each other and establish a direct end-to-end encrypted connection without requiring you to configure security groups, firewalls and opening ports. This approach eliminates the need for complex network configurations, provides a straightforward way to secure communication between specific resources, and saves one of your company's most precious resources: time.
NetBird offers flexibility with two main options for connectivity:
- Direct machine connections: The preferred and simplest method involves installing the NetBird agent directly on the machines you wish to connect. For example, installing the agent on your on-premise database server and your cloud-based web server ensures direct, secure communication without exposing the entire network.
- Network routes: For scenarios requiring access to the entire infrastructure on AWS (or vice versa), NetBird supports network routes. You can run NetBird network routes on your on-premise setup and connect individual NetBird peers in the cloud or set it up the other way around. This flexibility allows comprehensive access while maintaining security and ease of management.
Conclusion
In this tutorial, you learned how to configure a site-to-site VPN to connect your local environment to the cloud. While it may seem straightforward initially, additional overhead may be required for more complex network architectures or environments with productive resources, failover mechanisms, proxy settings, or load balancing .
NetBird offers a powerful alternative for creating and managing site-to-site VPNs. Setting up NetBird is significantly easier compared to traditional AWS site-to-site VPN configurations. With NetBird, you can connect machines directly without complex network configurations.
Now that you know what it takes to set up a secure connection between AWS VPCs and your on-premise environment, take a minute to experience the seamless and convenient configuration NetBird has to offer. You won't regret it.